| Niki's
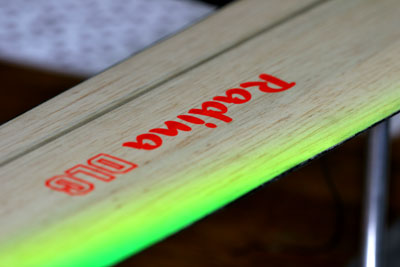
Radina DLG |
|
|
|
|
Item |
Specification |
| Wing Span |
1495mm |
| Wing Section |
Thermik unique |
| Wing Area |
21dm2 |
| Wing Load |
14.5
g/dm2 |
| Structure |
Glass-Balsa-glass
Sandwich |
| Portability |
|
| |
| Tail
plane |
Tail Type |
flat (form coated by micro glass) |
| Tail Area |
3.6 dm2 |
| |
| etc. |
Total Weight |
280-350g |
| Radio Gear |
4
servos |
| Fuselage Length |
1,090mm-1155mm |
|
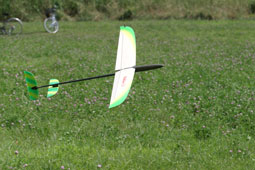
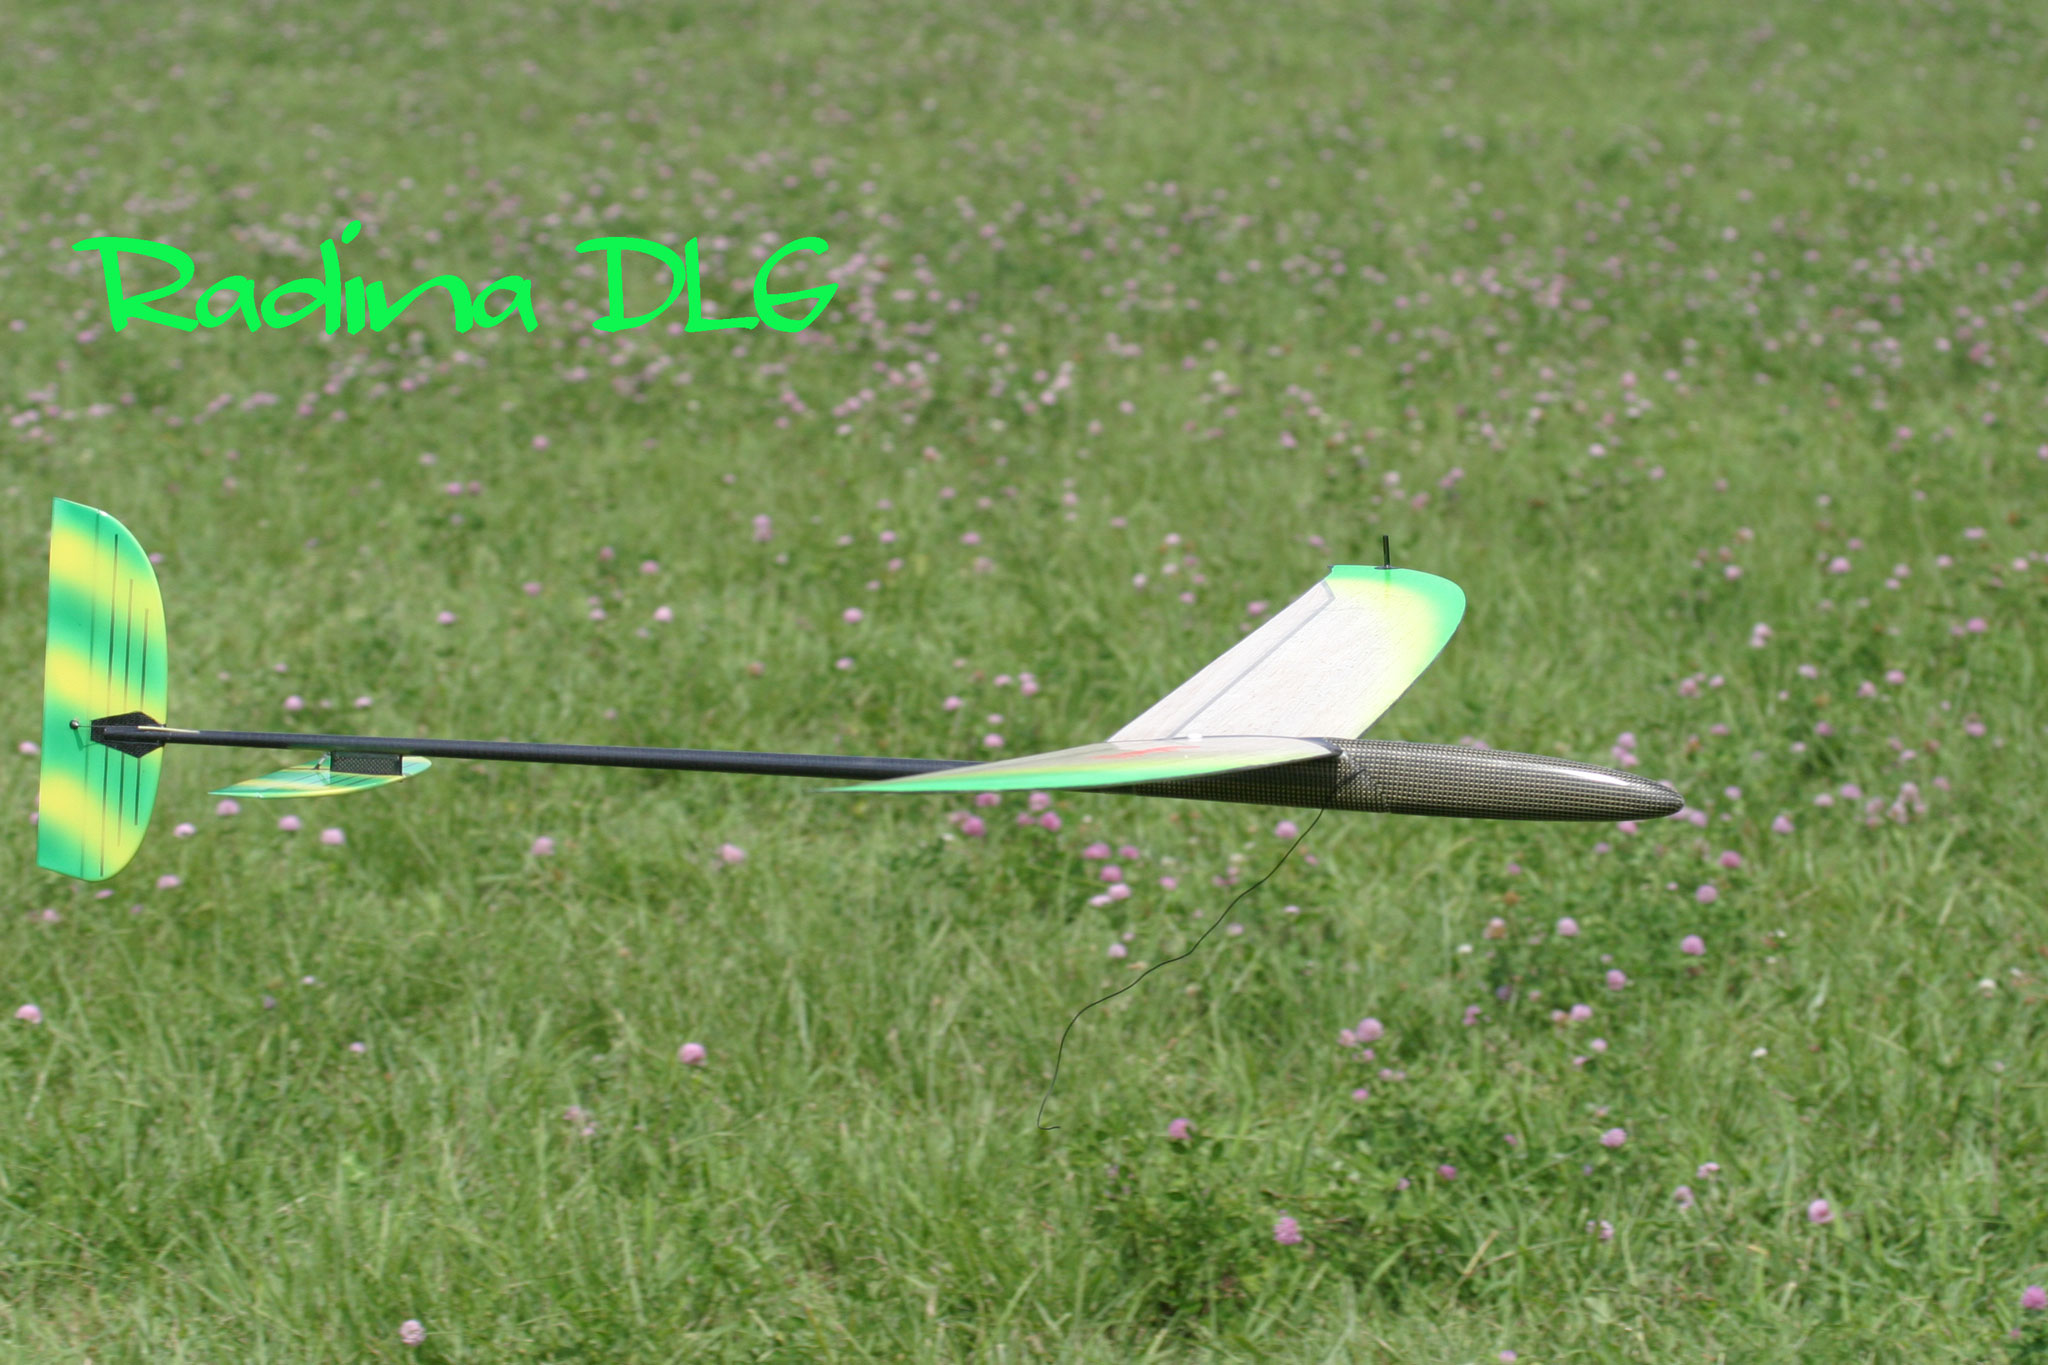
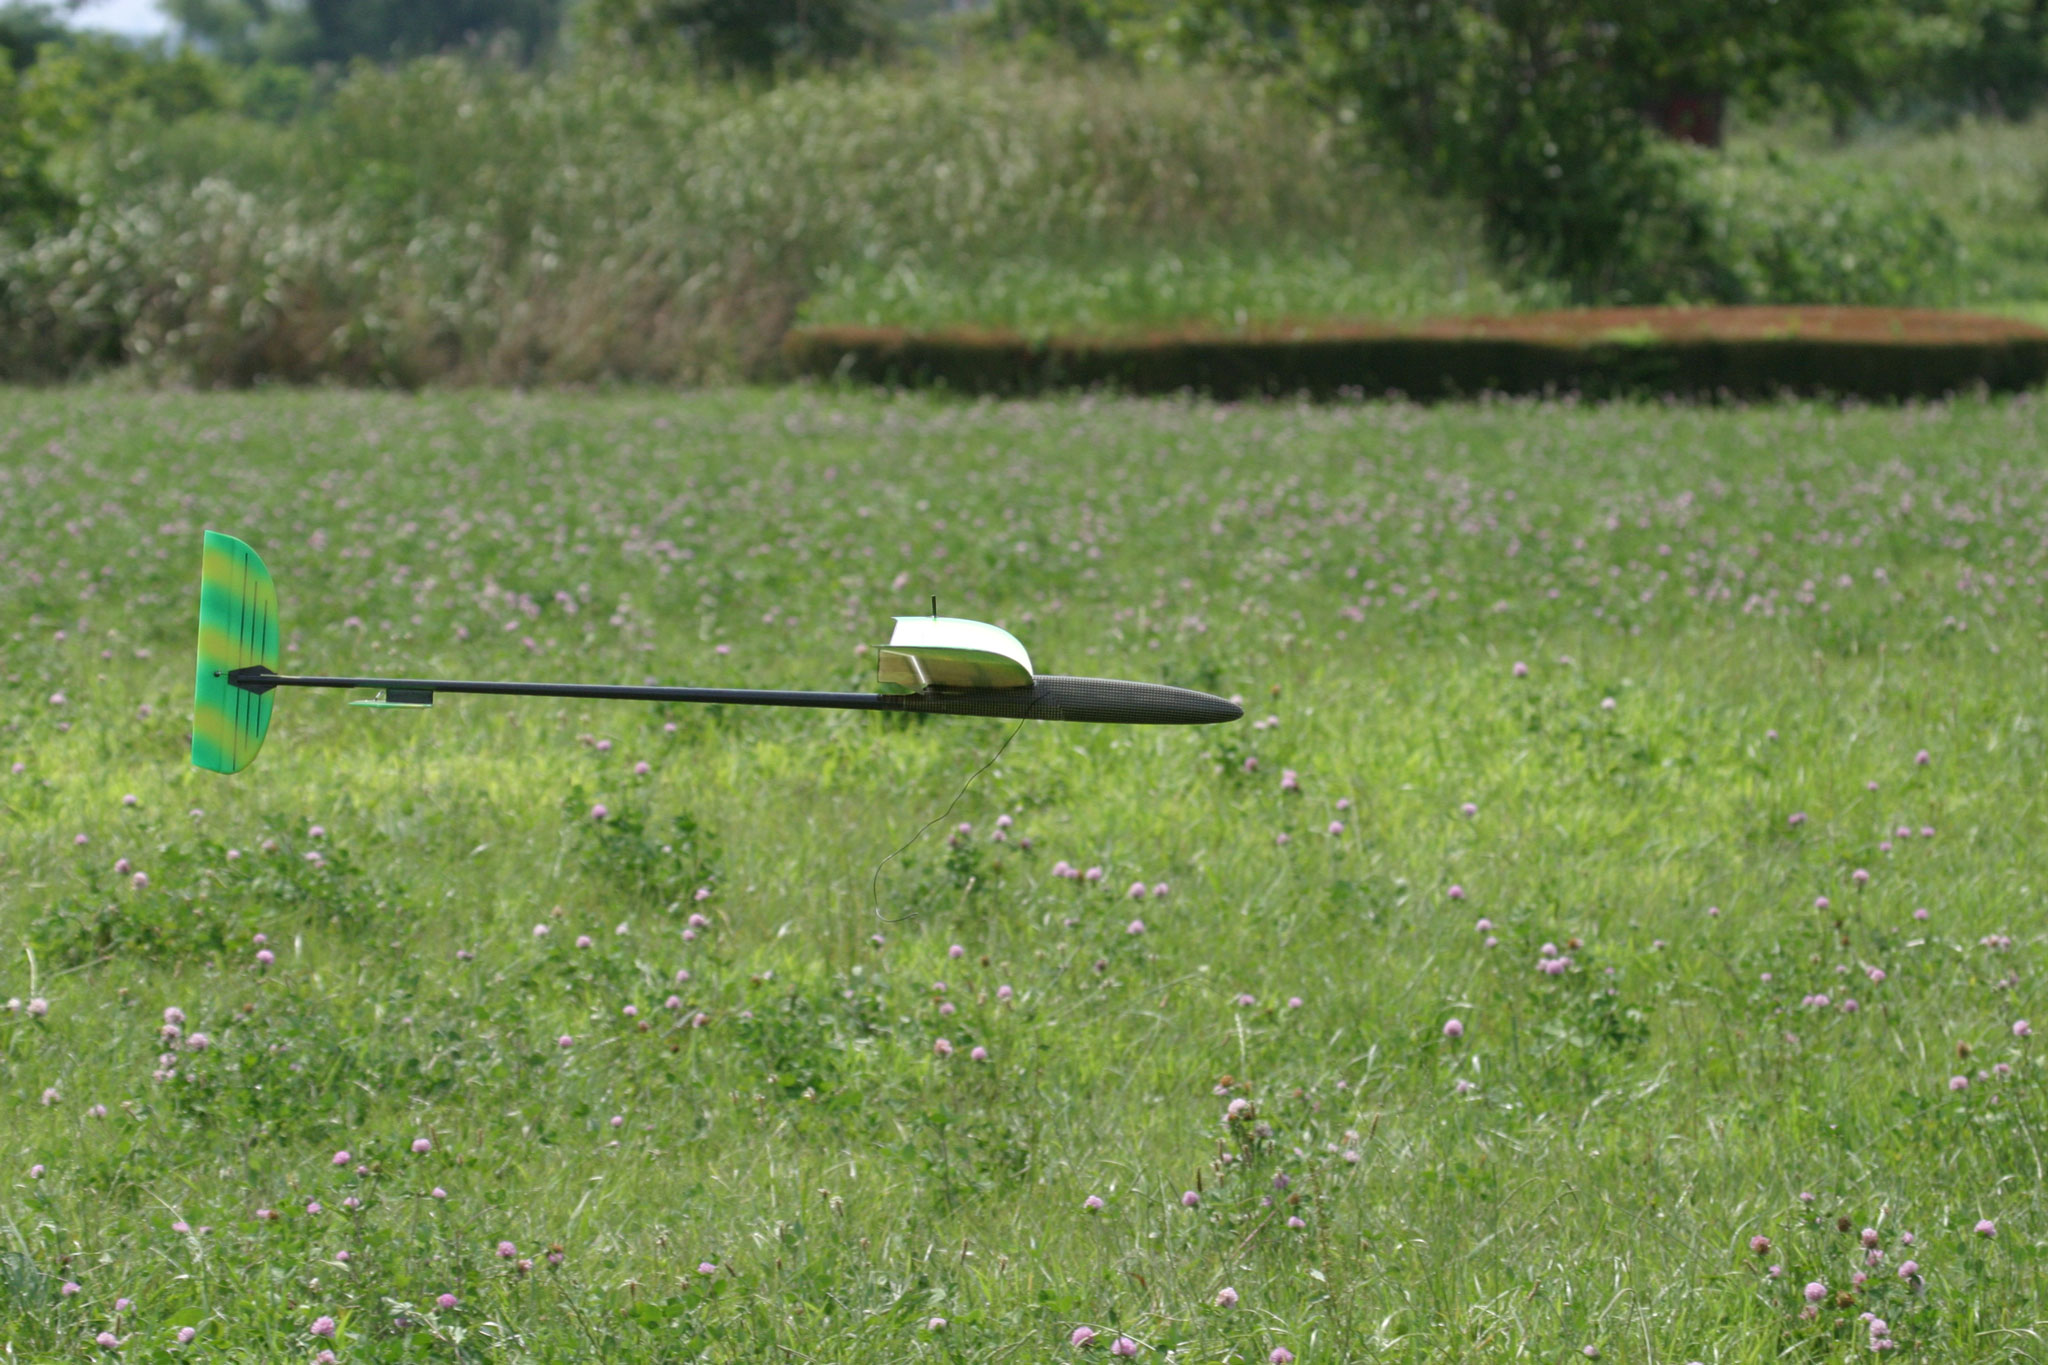
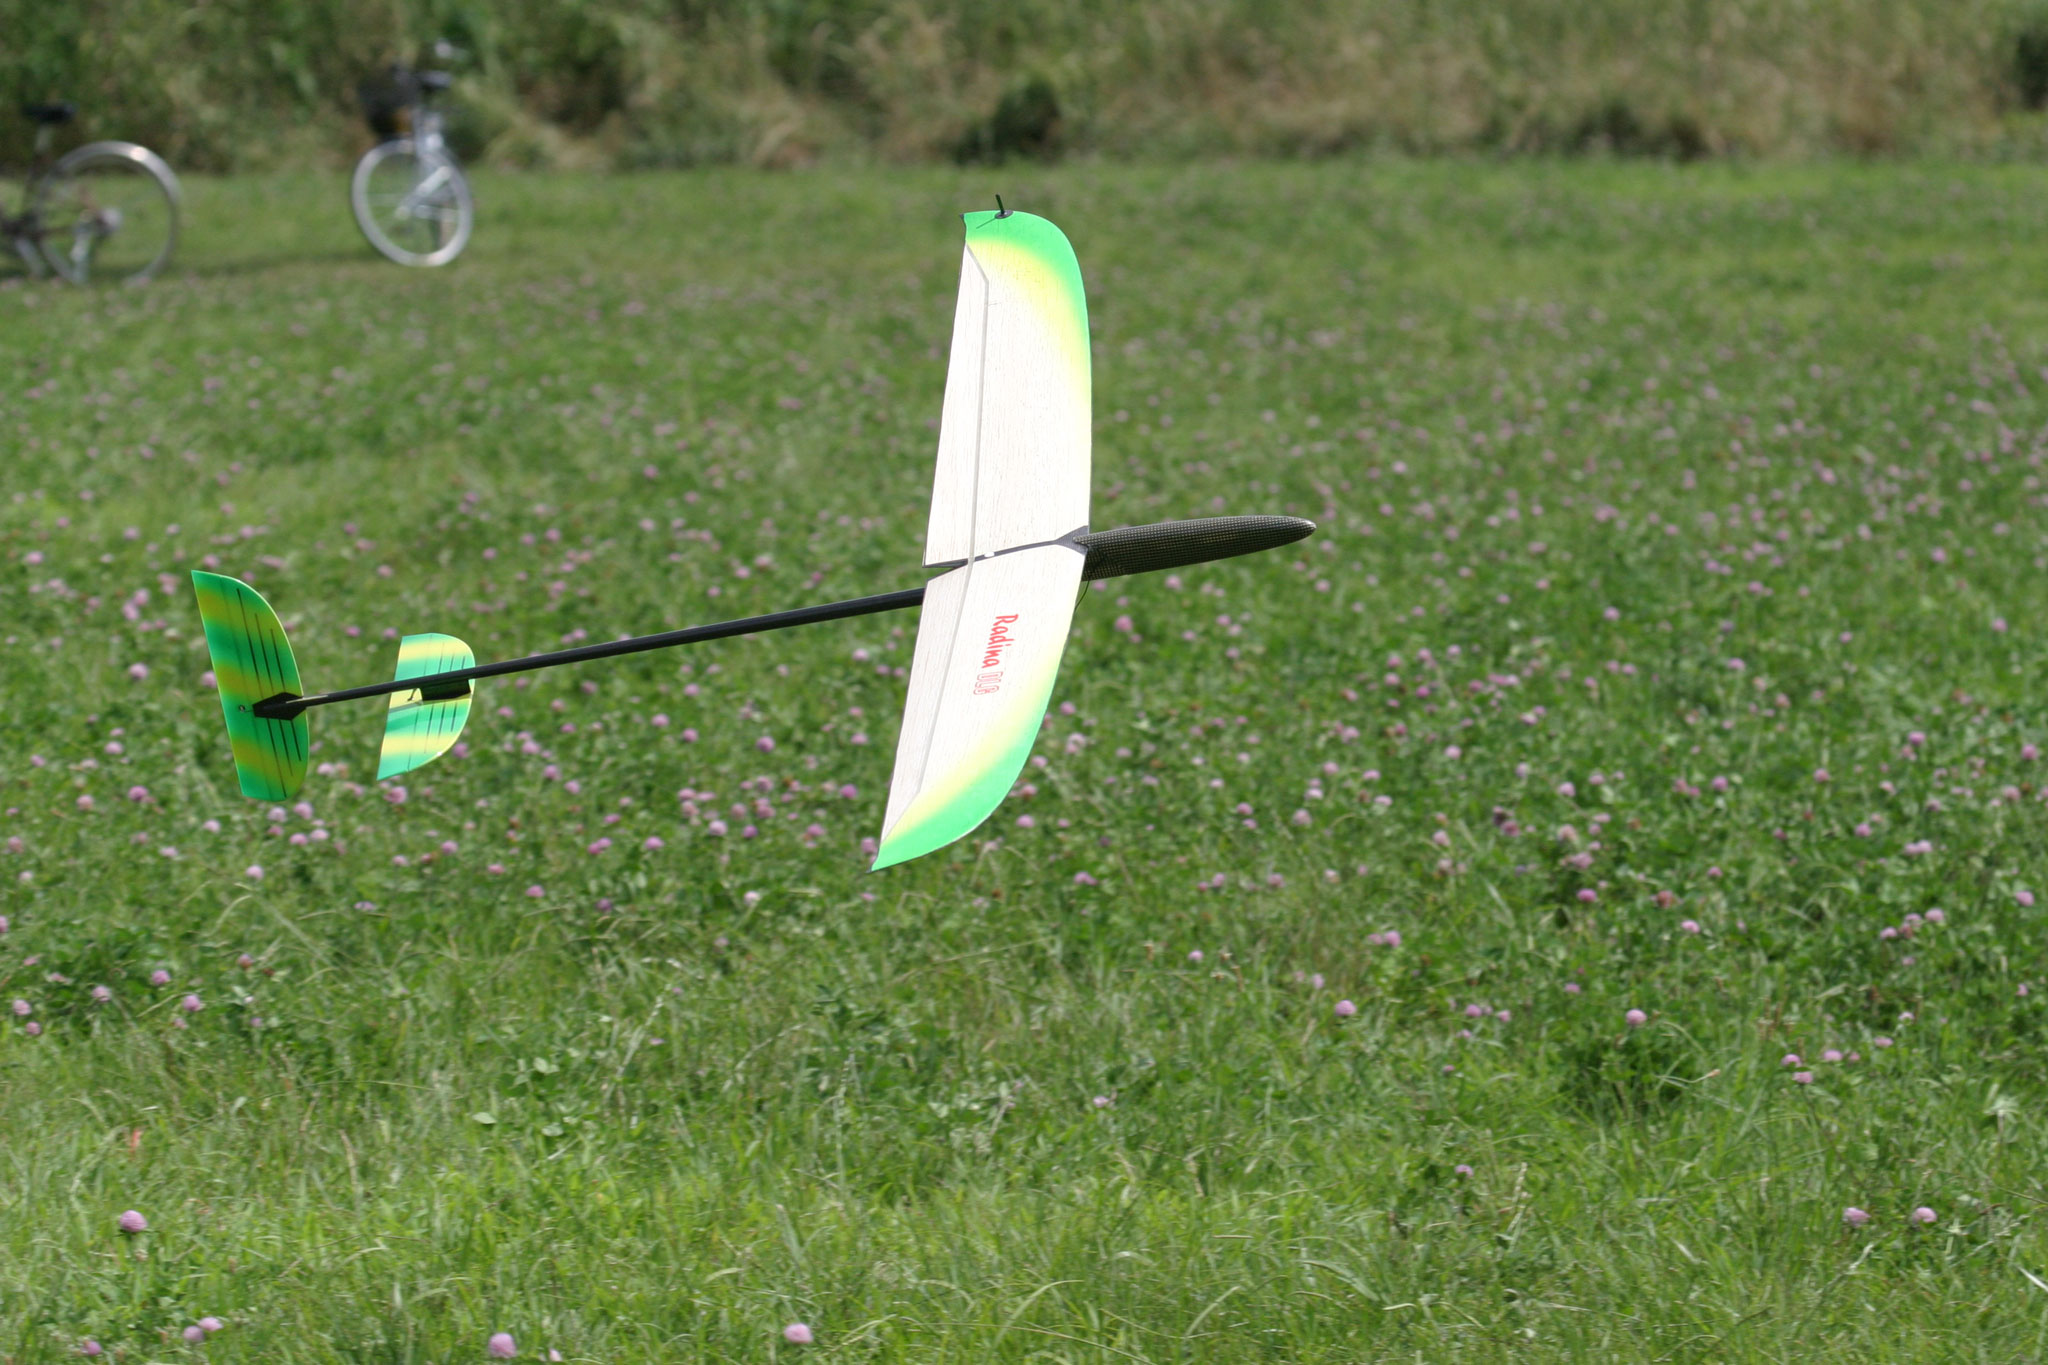
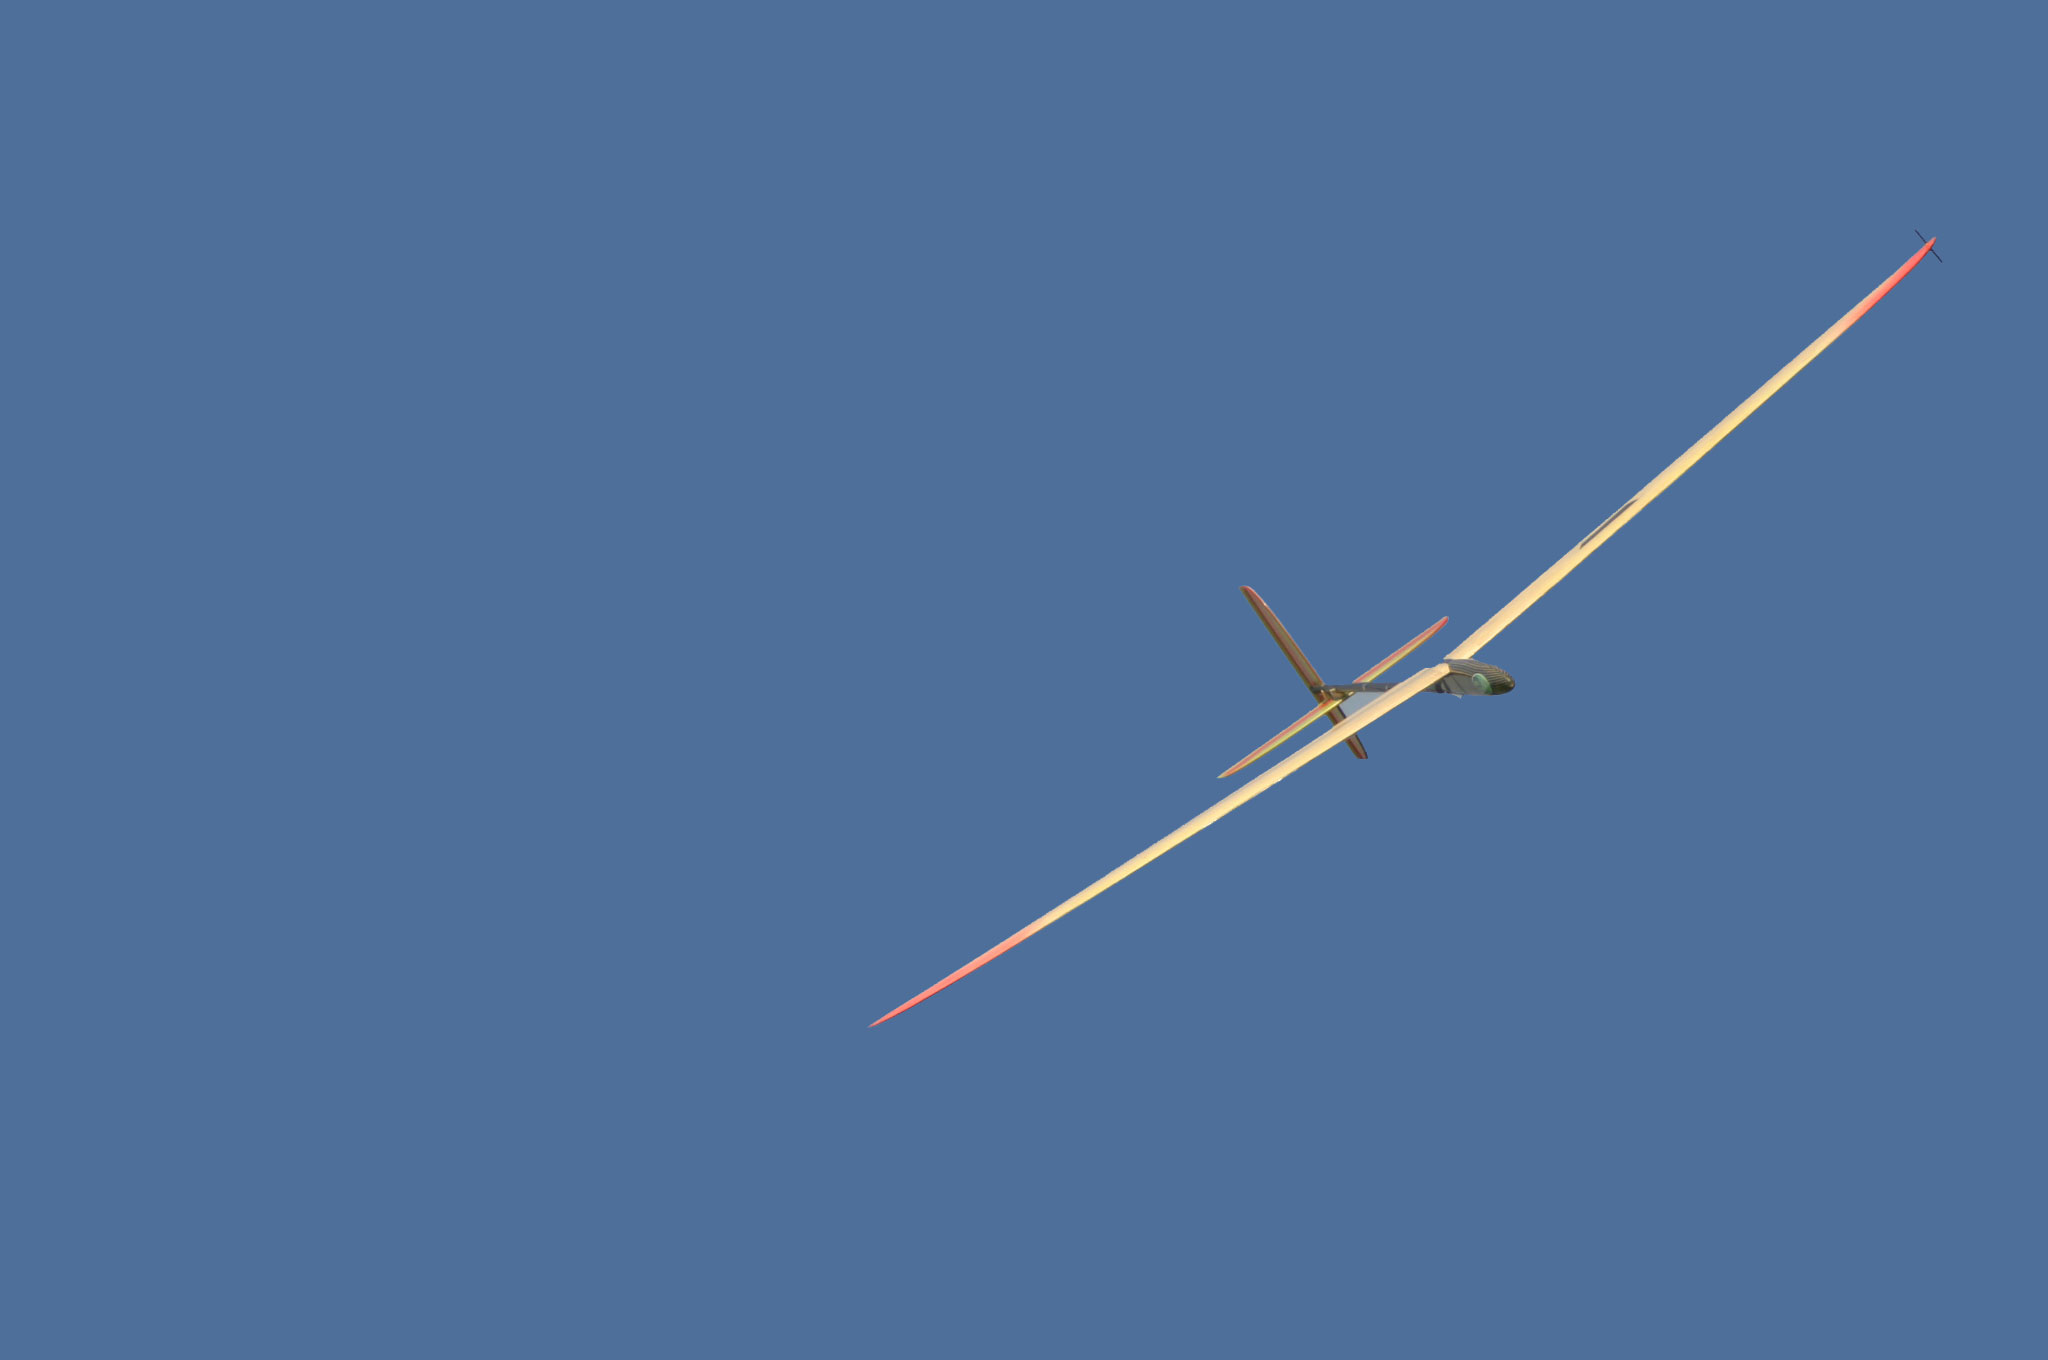
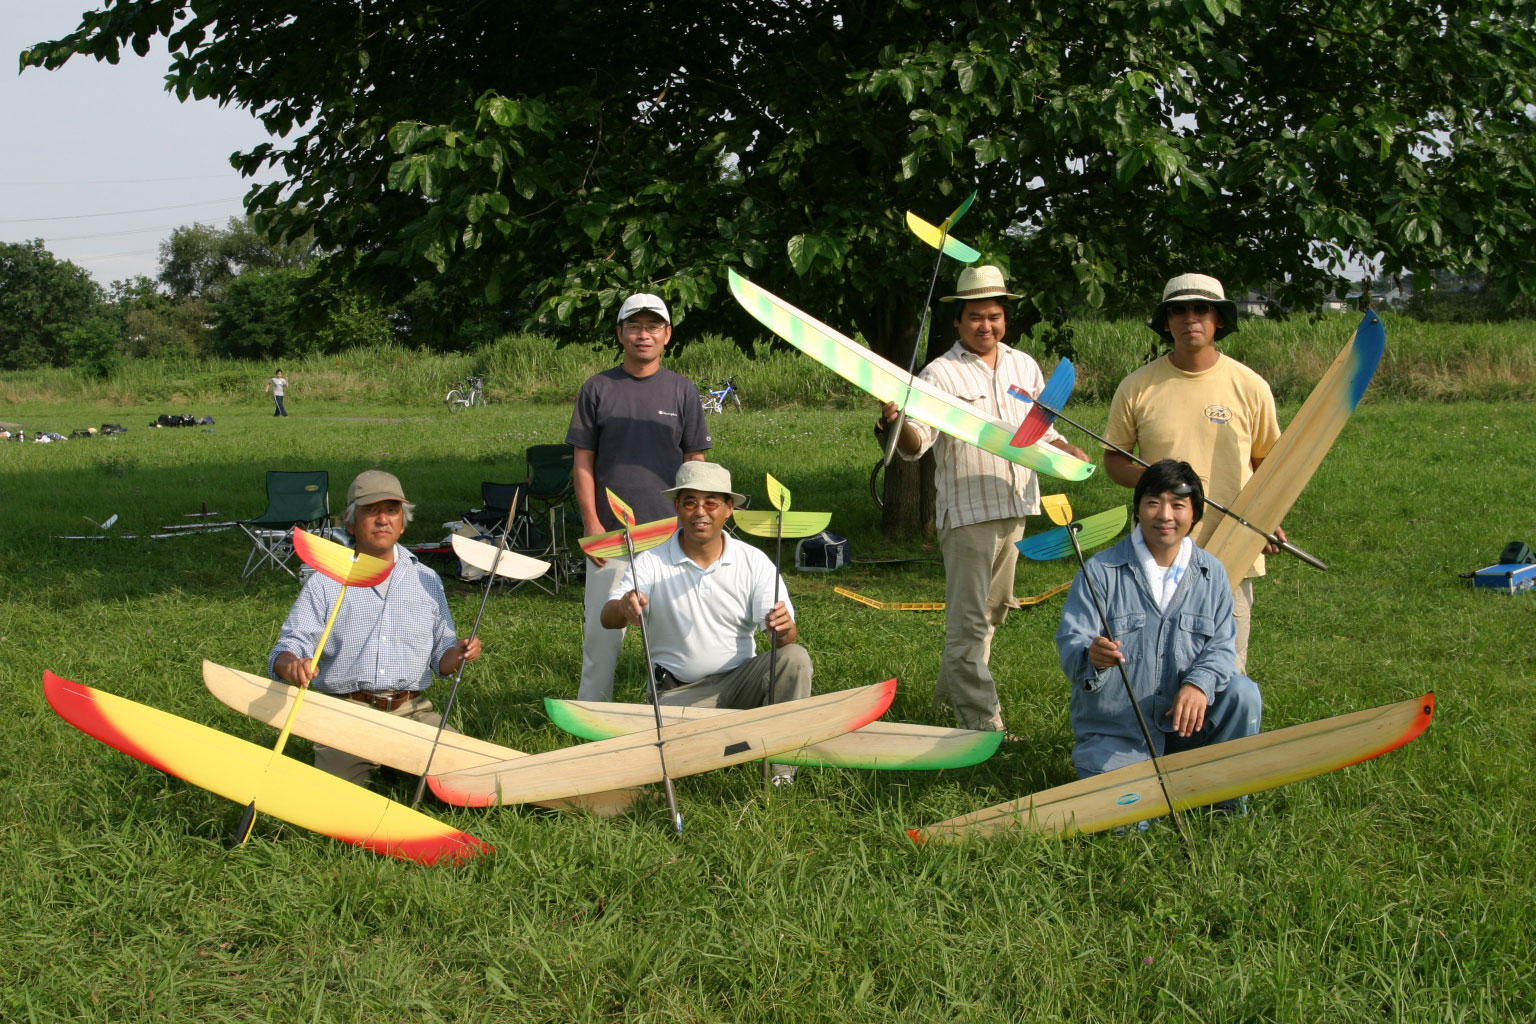
Radina DLG was designed and manufactured by Niki(Nikolay Nikolov). He has also designed and manufactured other Niki's family models that is represented by Niki's Betty. The molded main plane of Radina DLG is based on Niki's high quality technology, is very high performance, stiff and light. The acquired altitude by the Discus launching is very high, which reaches up to 50m under windy condition. Radina DLG is loved by the fliers in the whole world. There are also many fliers in Japan, too, who love Radina DLG's. Some fliers have more than two Radina DLG's.
The discus launch glider is completely different from conventional sailplane that flies like a small leave in windy days, because it is so light. Because DLG is launched by energy of the centrifugal force, the heavier it is, the higher altitude it reaches to. Total flying weight becomes from 250 to 350g, Remember that the effort has been made on making HLG lighter, so far. The DLG innovated the technology of HLG.
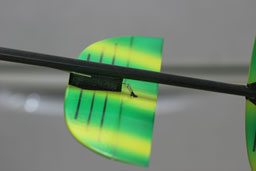
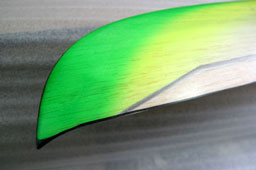
One of the excellent feature of Radina DLG is the end of flapperon. The flapperon end is fixed at the tip end as shown by the following picture. The long aileron is likely to cause flattering theoretically, when aileron servo locates at the other end of flapperon. Radina DLG fixed this issue completely. You can avoid anxiety over flattering. The fixed flapperon can be expected to improve the tip stall characteristics by so-called washout as well as fixing flattering issue. The washout is effective for the high-taper wing or the sweptback wing. We can not evaluate how much effect it causes, but the fixed flapperon make the aileron control be mild. We can fly Radina DLG very smoothly like an Eagle, a bird as my experience.
Second feature of Radina DLG is the goodness of the total balance of it. The comprehensive evaluation marks very high score from the view point of the performance, stiffness, weight, cost, beautiful outlook, design and so on. Now Radina DLG is the de-fact standard of the discus Launch Glider. |
 |
|
Design/Manufacturing
|
|
|
Dealer & price |
Please ask its price to above dealer.
|
|
 |
 |
 |
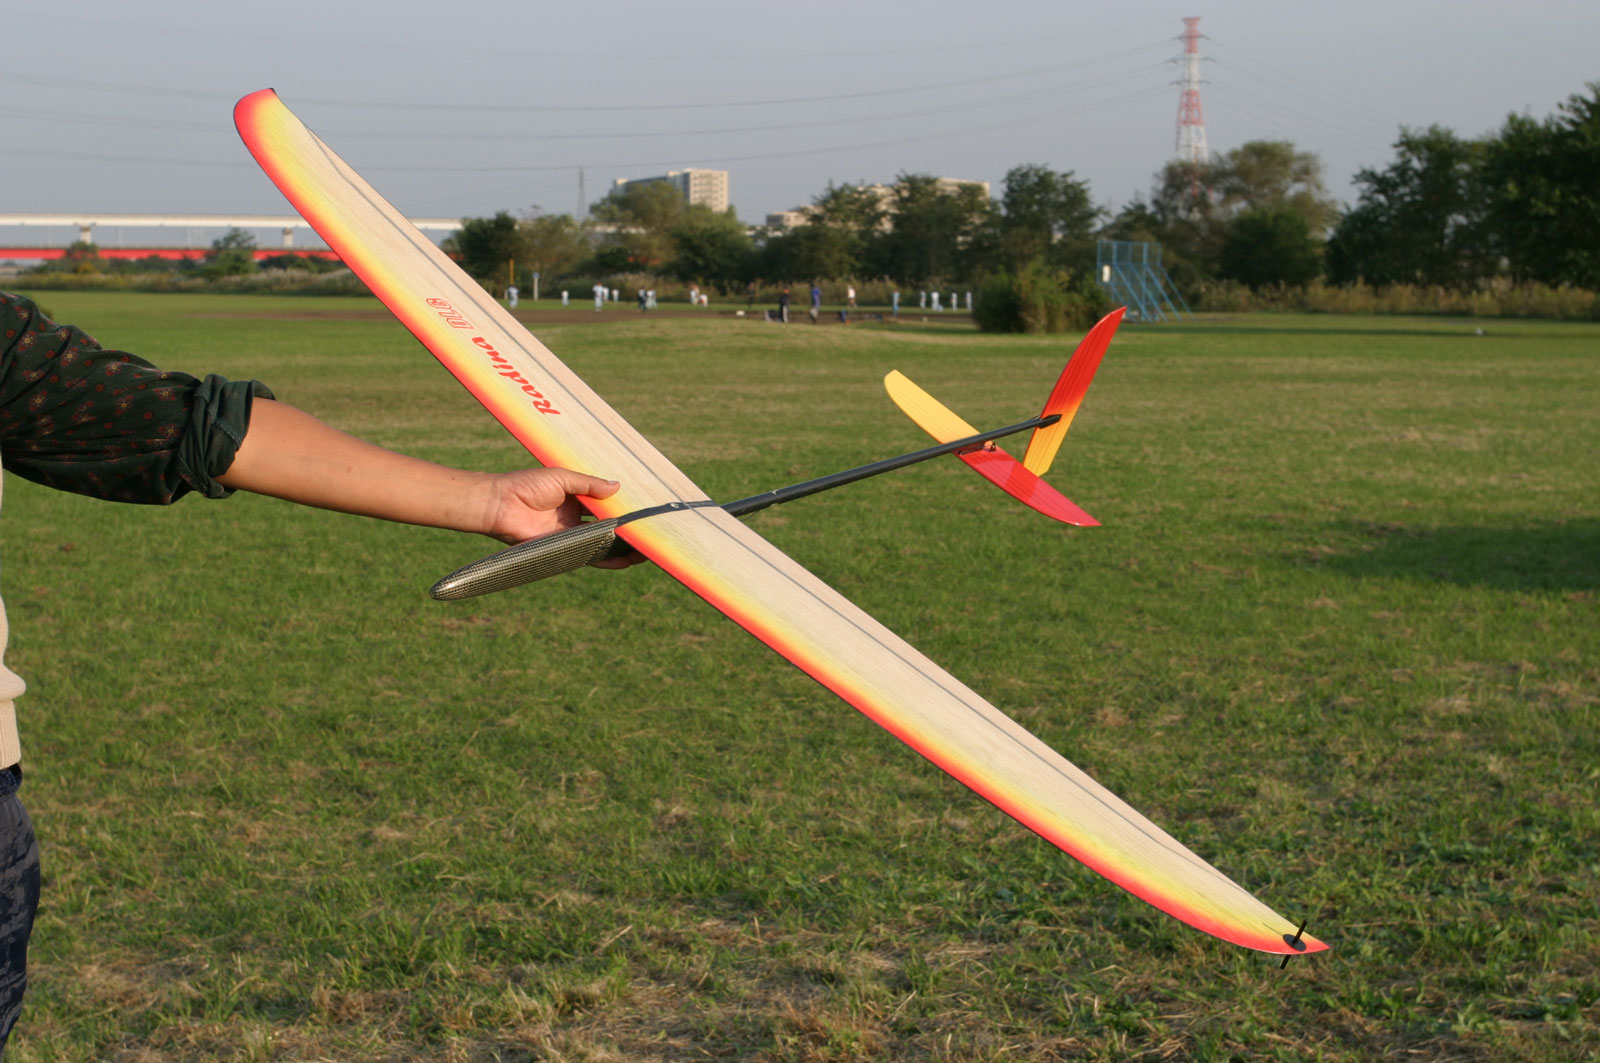
| Side view. No yawing at launching, because of this long fuselage. |
Please look at this beautiful model. |
Aileron (Flapperon) does work stably. |
 |
 |
 |
Red Radina DLG in the sunset. (Holder is Mr. Hirata). The red sun light makes Radina more red.
|
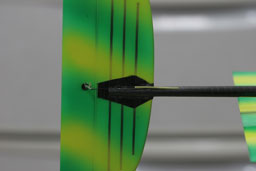
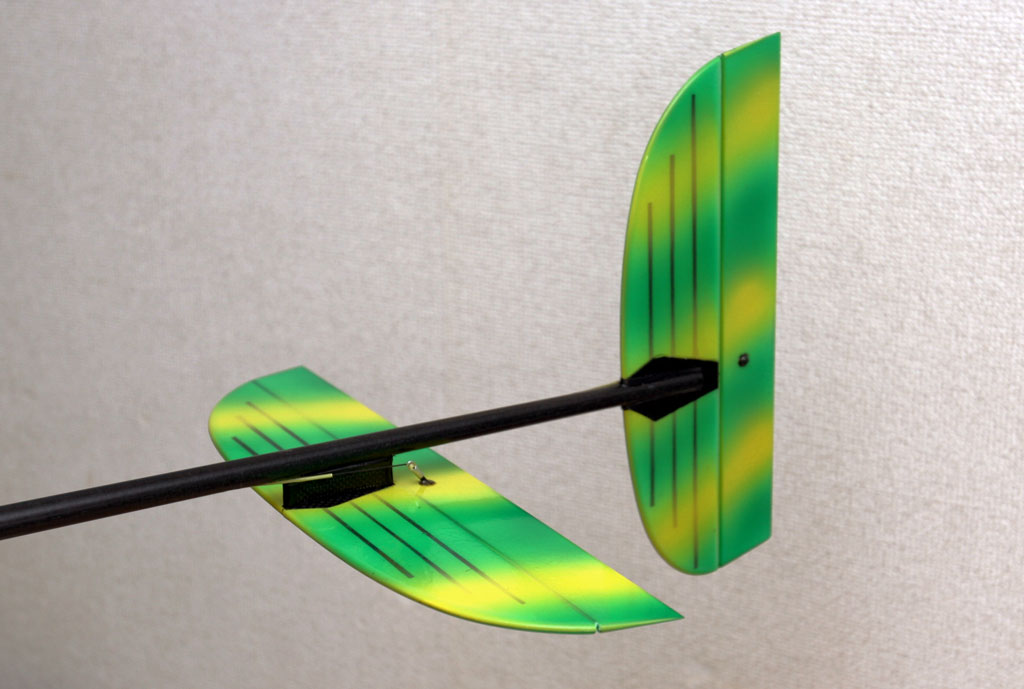
X-tail. Elevator can be place either on the boom or below. It is up to you.
When you adhere elevator, Be careful so that it is parallel to the main plane and right to the boom. |
The mounting block is made of the balsa block whose side is enforced by carbon cloth. Rohacell can be used in stead of balsa block. Elevator is placed on the block and fastened by metal screw. Otherwise skin of the elevator will be scraped.
|
 |
 |
 |
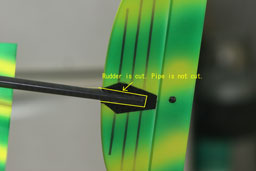
| If the rudder is put in to the slit of pipe then it will be stable. However there is another way. Without slit in the pipe, cut rudder so that the pipe is embedded into the rudder. The pipe will not be broken if rudder is broken. This is an idea by Mr. Hirata. |
This picture shows an example a very thin carbon rod is used for control rod that is expensive. The wire harness is used in usual. The string linkage is not recommended because it is likely to be loosen. |
The linkage of flapperon is directly connected with servo accommodated in the fuselage. It makes disassembly easier. Aileron horn is made of carbon plate or wood plated reinforced by carbon cloth. |
 |
 |
 |
| It is the unique mechanism of Radina DLG. The end of flapperon is fixed so that flattering might be suppressed. In addition, the washout effect is expected that improve tip stall phenomena. The both inner tip ends of the wing are reinforced so that either left arm can fly DLG as well as right arm. |
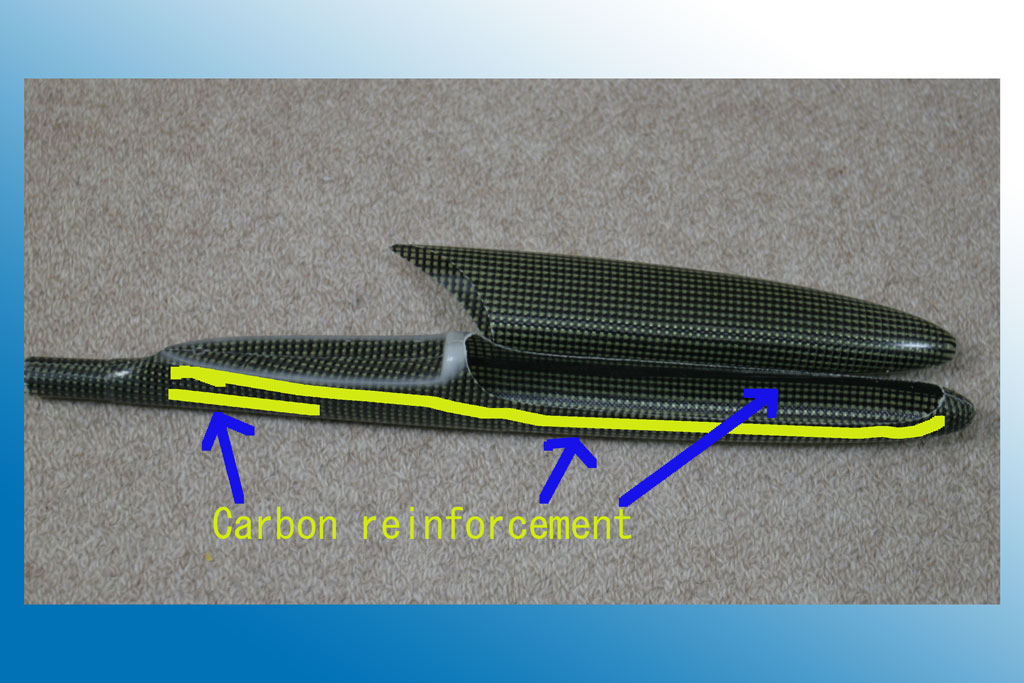
The fuselage pods of the earlier version was broken near the center of it when it is launched at the full power swing. However, it has been improved, there seldom occurs such a accident as of now. Only the required portion is reinforced so as there is no excessive weight increase.
|
Nikolay printed the name. This name is just suit for this beautiful models. I like this name. |
 |
 |
 |
|
The latest model is reinforced at the center of wing. The wing became to be thinner that improve penetration. |
The full span aileron is fixed at the far end. The washout effect will be expected. |
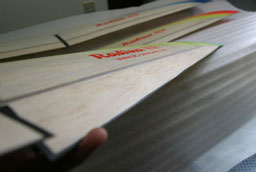
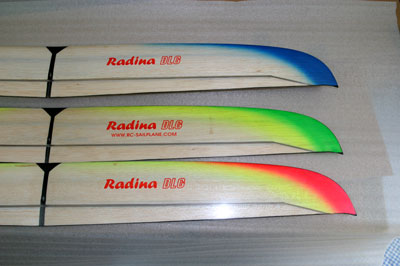
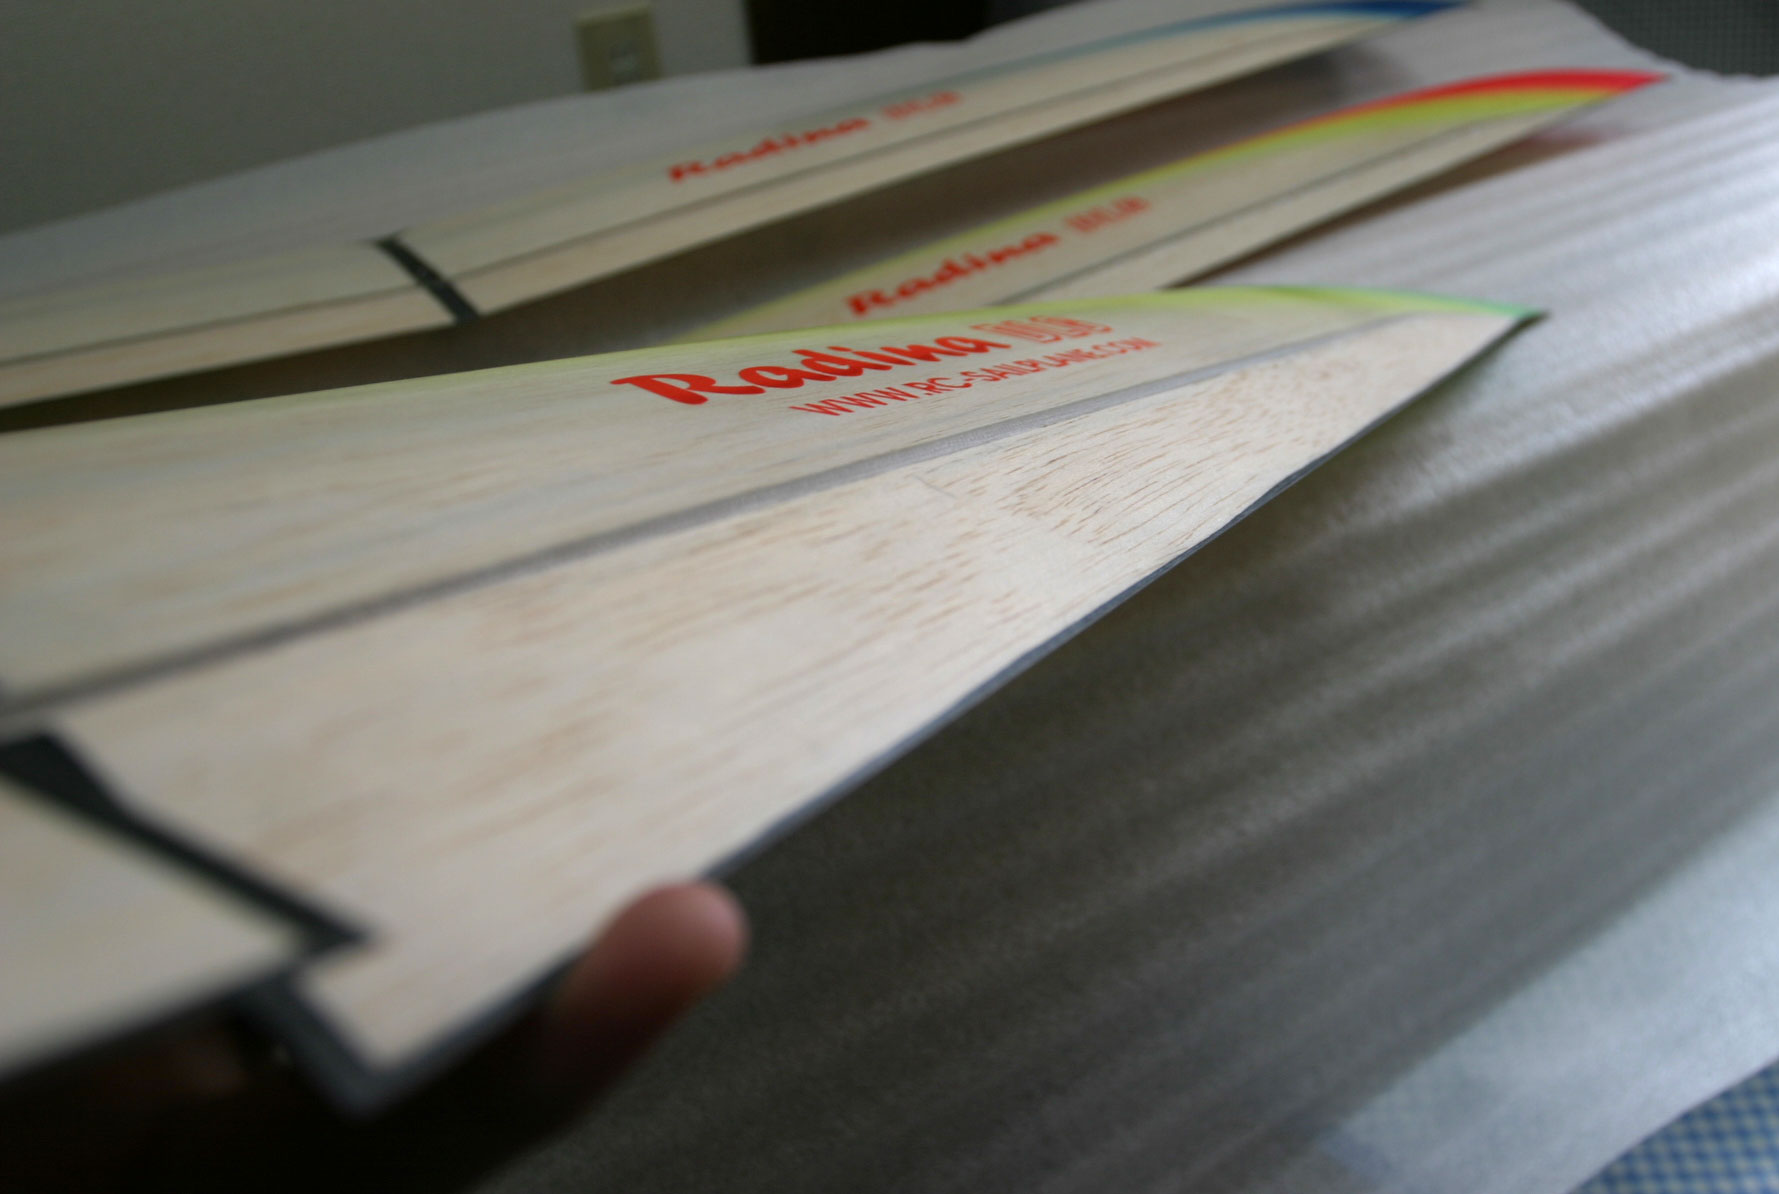
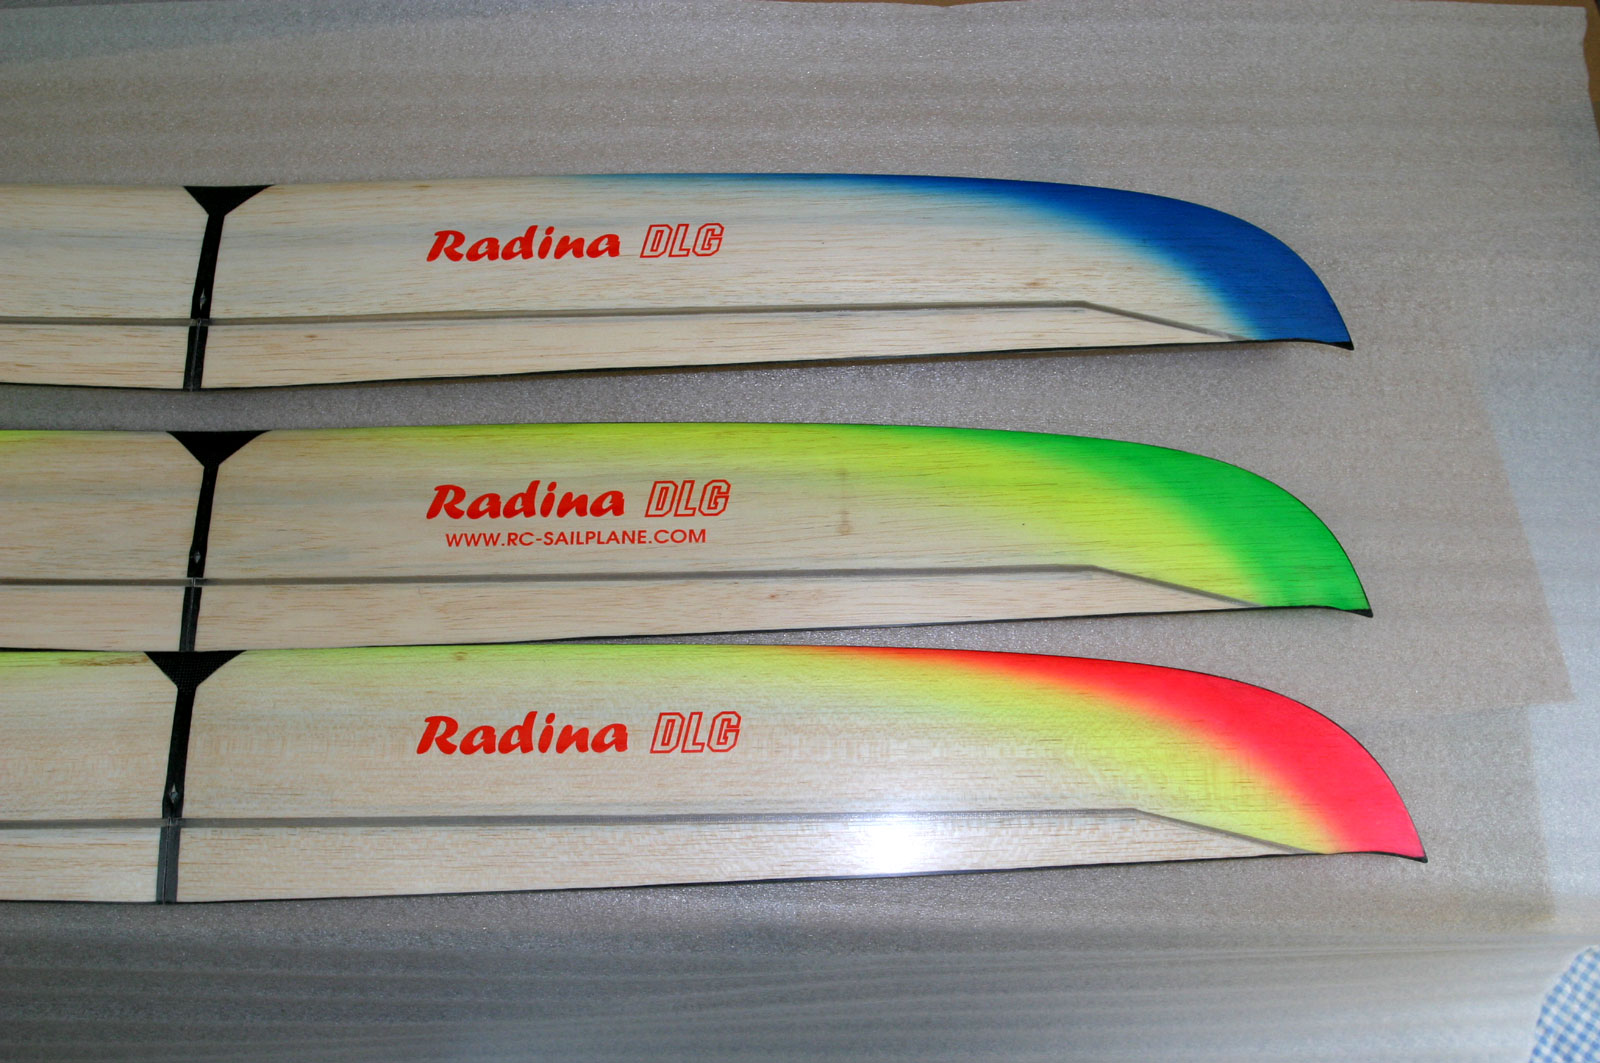
Radina Standard color. Three colors are available. |
 |
 |
 |
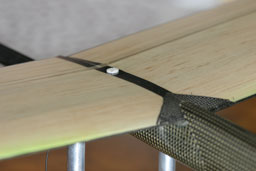
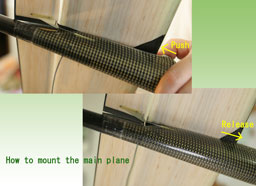
| At first, the linkage is assembled with flapperon, and push wing rearward, and dowell can be put into the hole. At the disassembly, linkage can be easily released by the fingers. |
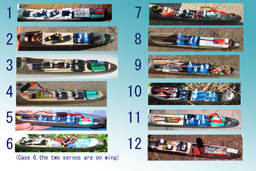
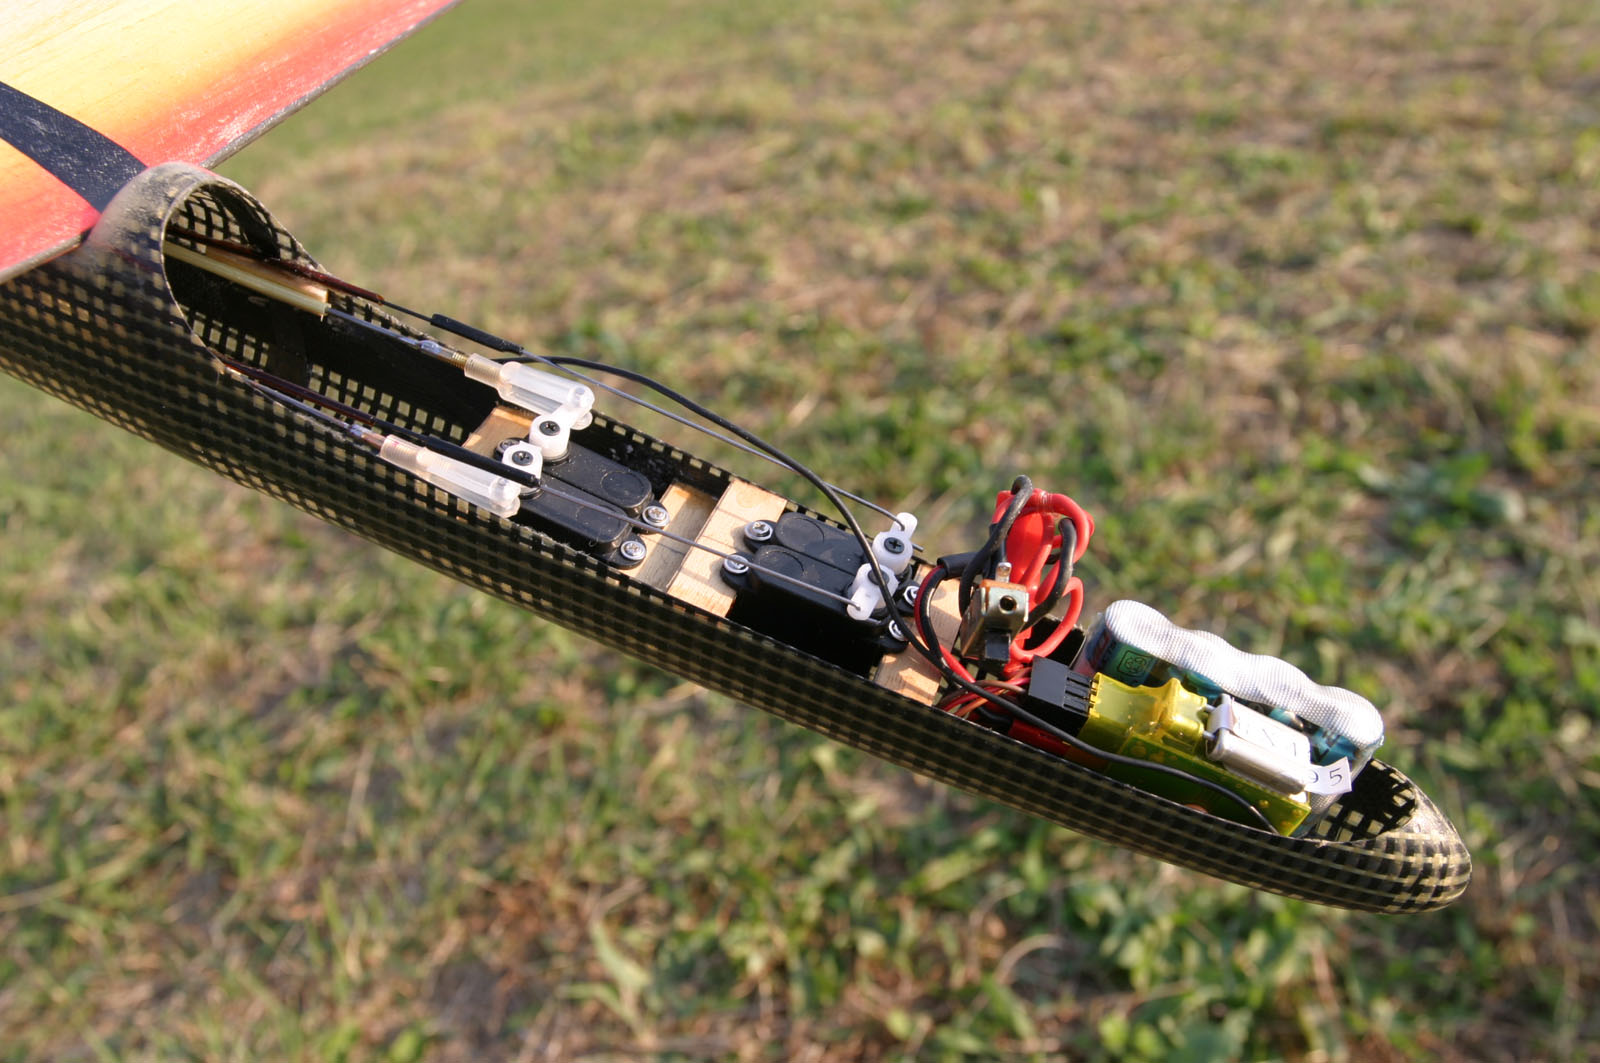
Radina DLG allows fliers with freedom of installation of radio gear and servos. There is another installation except above. Let's think of it. |
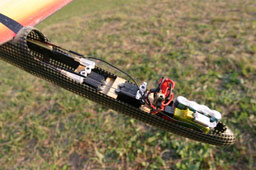
A example of mounting radio gear. Though aileron servo can be built-in into the wing, Mounting all servos into fuselage results in the mass concentration that decreases the moment in the direction of Yawing. Finally, it will reach to higher place. |
 |
 |
 |
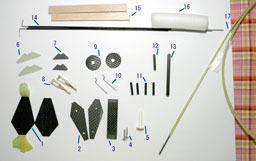
The parts required to assemble Radina DLG that are not included standard kit. Those are hand made parts by Mr. Hirata, my friend. If requested, it can be sold.
If you don't want to make your room full of gash or dust, it will help you, especially for the beginners.
|
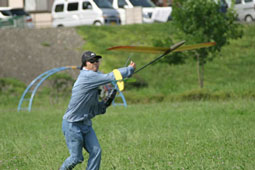
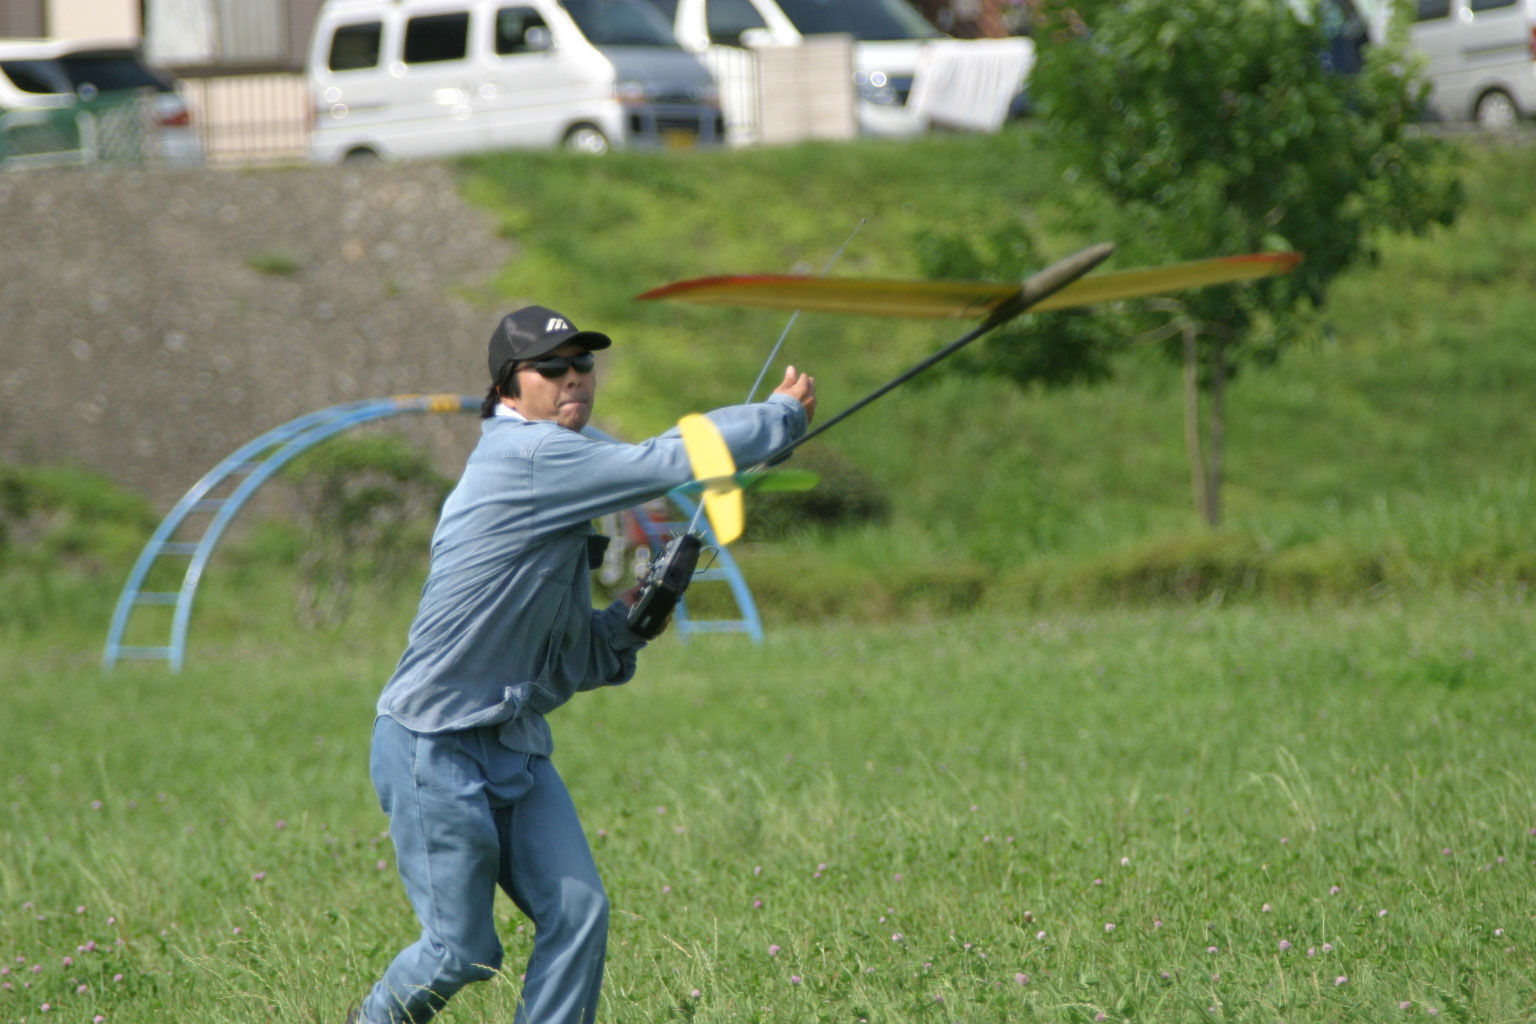
Excellent is the launch by Mr. Sato. The head goes just to the direction of the front of his body.
|
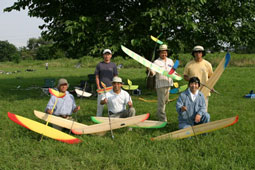
It is the Radina DLG that makes us be happy. Radina DLG fun club is still growing. |
|
| Wing: |
(1) Structure
The main plane is fully molded and no blue foam is not used inside. Though it looks as if it is made from only balsa according to the picture, the wing structure is the Glass/Balsa/Glass sandwich which is like the structure for the F3J open class model. In order to make it light, it is painted only at minimum. Nikolay has sent the High light series model to the world using the filmed model technique for the free flight model. In case of Radina DLG, the manufacturing technique for open class F3J(/F3B) model seems transferred to 1.5m Radina DLG, conversely. Flapperon uses the skin hinge technology for the open class.
The trailing edge is reinforced by the carbon roving and is to be like a knife edge. The wing profile at the first model seemed to be SD7080-modified which is to be theThermik unique profile, But it has been changed at least three times and the unique wing profile. The wing center of its leading edge is reinforced by carbon cloth shown by above picture. The wing became a little thinner at the center of leading edge compared with early models.
This modification improved the its penetration and thermal performance greatly. The model made by Niki acquired its acknowledged evaluation that the model is robust as well as very light weight so far. The wing is very strong. I have never heard that the wing was broken by the full swing. I have clashed into the ground twice. The fuselage was a little damaged. However the wing had no damage. It is one of the reasons that Radina DLG is widely recognized by from beginner to competition fliers. It was known that the Hand Launch glider (HLG) was easily broken in usual. Therefore after flying, HLG required its repair some portion usually. Radina DLG seems to be maintenance free except dusting the model off.
(2) Flexible aileron (Elastic Aileron)
The most outstanding feature is that its aileron is fixed at the tip end. It is like a elastic rotor of the Helicopter. The aileron end is cut athwart. Fixing aileron end prevents from flattering in diving at high speed from high altitude. It makes the stable flight as well as preventing to break the gear of servo. From the view point of aerodynamics, the camber is strong at the root of the wing and is gradually relaxed along the elastic aileron. There is so called the Wash-out effect. Because the air flow is guided from center to the end of the wing tip, the air flow cause buoyancy even at the low speed. It is expected to result in that the tip stall is suppressed effectively. The similar technology has already been used by the HLG made by D.J. Aerotech, named "Monarch" The technology used by the Monarch used a mechanism like skid under the wing. However the technology seemed to be un-sophisticated. The technology used by Radina DLG is simple and robust in its structure. The simple is the best.
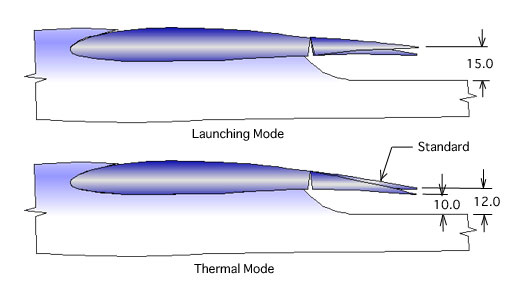
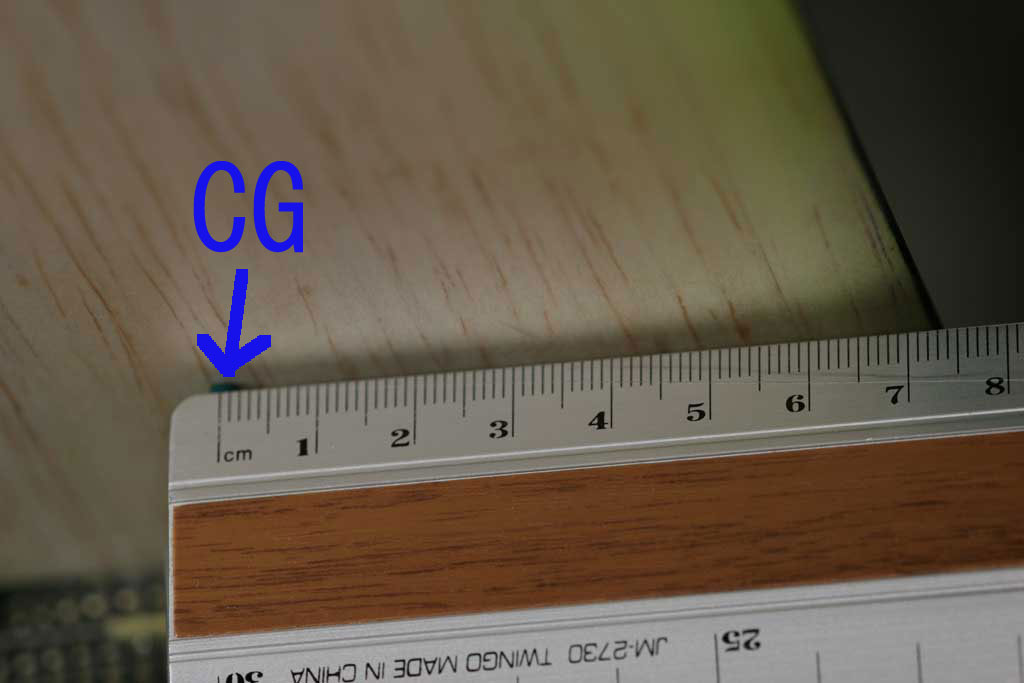
(3) Standard trim
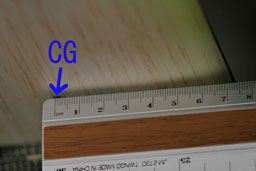
Standard trim is as follows, reported by Mr. Kanoh. The aileron does work as flap. In other words, it is flapperon which can make camber. It is the first task that the neutral trip position must be found. There is no mark for standard trim of flapperon, because there is no fixed portion around the center of the wing of Radina DLG. Therefore standard trim must be measured by the distance from the top of the pipe fuselage as shown in the figure below. The center of the gravity locates comparatively far from leading edge compared with conventional HLG as shown in the following figure which shows CG locates 73mm from the leading edge. The CG is just in front of the screw for fixing wing. Nose ballast is required to be about 5-20g. It depends on the the way of installation of the radio gear. In windy day, the ballast is required to be added, because the standard CG locates a little rearward.
|
Standard Trim recommended by Mr, Kanoh
| Elevator |
+5 mm -5mm |
| Rudder |
+10 mm -10 mm |
| Aileron |
Up 12 mm, Down 5 mm |
| Flap |
+2 mm, -2 mm |
| Aileron-Rudder mixing |
80% |
| Thermal flap |
Down 2 mm |
| SAL(Launching) flap |
Up 3mm |
| Center of gravity |
73mm from leading edge |
 |
 |
The aileron requires the differential aileron mixing. The rate between the up and down positions is usually 3:1 for Open class F3J model, but it is enough for the Radina DLG to be around 2:1. The receiver require more than or equal to 5 channel. The transmitter must be required to have more than or equal to 8-9 channel to program various mixings. For example Futaba FF9 or higher grade is recommended. |
|
| Fuselage: |
(1) Fuselage stiffness
Fuselage is the so called Pod & Boom style. The pod is made to be very light. The nosecone is extremely thin and easily broken if you shake it by hand. However inner pod keep its stiffness. As the pod of the earlier model has not had enough reinforcement, the additional reinforcement was required on the inside of pod using carbon cloth. In general, the discus launch poses the centrifugal force onto the fuselage. The pod located before wing will be bent outward while the centrifugal force works during discus launch. Just after releasing the model, the repulsion is posed on the pod and the pod will be bent inward. Finally, the pod moves like a pendulum Because of it, we had such accidents that the fuselage of the early models were broken near the leading edge It might be the reason that the pod of early model had not enough stiffness. After such accidents, Niki improved the pod using effective reinforcement on the required portions as shown in the above picture and thicker material of Kevlar and carbon cloth. Now such accidents have gone. It might also be the reason that he flier has lesson and learn on the discus launching technique. They do not do hard launching, because they learned that the Radina DLG could attain the high altitude without strong force or swing. This is very important. (2) Mounting servos
Variety is the very spice of life. There are so many way of installation of the radio gear. Seeing is believing. Look at the examples by each flier. The pod and boom is delivered as they are separated. They must be adhered and fixed without permitting any rotation between and boom. Please remember reinforce using micro glass cloth at the joint portion of pod and boom. Otherwise boom will rotate and loose your precious Radina.
(3) Linkage
The 0.6 piano wire harness and guide tube seem to be the best way for the linkage for elevator and rudder, as the stable control is obtained. The double string linkage is also applicable, however it is inclined to be loosen, during discus launching as the fuselage will be bent by centrifugal force. Therefore it is thought that the string linkage may be not suit for DLG. The string linkage is superior to wire linkage because total weight will be lighter. However DLG is not needed to be made lighter. On the contrary, the heavier model create bigger centrifugal force and attain higher altitude. In actual, Radina DLG with 250g heavy stop to climb before it reaches the expected altitude. In general heavier model is superior to the light one for the discus launch. Of course, the heavy model is not superior in the thermal duration performance. The compromised point between attained altitude and thermal duration seems to be 300-350g as the flying weight.
|
|
| Flight: |
(1) Attained altitude
Above all, it reaches to as high altitude as everyone surprised at. The average is 40m even if the beginner flies, It attained sometimes 50m if fliers do well as show left LOLO altitude log that was the flight record by Mr. Kanoh under against windy condition.
(2)
Effect by the full span aileron and aileron rudder mixing
Full span aileron fixed at tip end does work well, it is not needed to be moved so much. But effective aileron can be a Effective air break that cause yaw. If the airplane turns right by making right aileron up and left down. In general aileron works well when it is down rather than up, because of the asymmetry of the wing section profile. As a result, the model receive force that turn it to left. It is observed the phenomena the model slide toward left in case of the above. This is so-called yawing.
In order to cancel this anti-force (yaw), there are two way. One is to use differential aileron mixing in the transmitter, the second is the Aileron-Rudder mixing in the transmitter. |
 The altitude Logger log data by Mr Kanoh dated on April, 2004, The altitude Logger log data by Mr Kanoh dated on April, 2004, |
a. Differential aileron mixing (If you know well, section a. and b.)
Even if the up -displacement is the same as down, when aileron is down, the aileron cause the bigger breaking force than when it is up. Therefore the down trim of aileron must be lower than up trim. The ratio is recommended to set 2:1 for up and down-trim of aileron. if maximum up-trim is 10mm, then down-trim should be 5mm using the differential aileron mixing.
b. Aileron Rudder mixing.
If you use aileron Rudder mixing, when aileron is operated so as to turn the airplane right, then make rudder trim so as to turn right. It will cancel the yaw. However, this too much mixing is not recommended, because rudder can be also break, the speed is too much decreased by this mixing. If you use this mixing, it should be at most 5% for the rudder mixing, assuming the movement of aileron be 100% in case of the Radina DLG. When the Radina is circling in the thermal, this mixing should be turned off for stabler circling.
(3) Thermal Duration
It is the thermal duration performance that the flier wants to know the best. It is very good. It must be paid attention that the meaning of it is different. In other words the cruising speed of Radina DLG is faster than the conventional HLG, because it is heavier in usual. So we must change the way to fly the glider. Because the thermal not always big, we should search thermal utilizing its fast foot of radina DLG without staying single thermal. If the model is light, it can stay on the single thermal and fly carefully not so as to drop out from the thermal. But Radina DLG is heavier, the gliding ration must be lower than the lighter one. Therefore we should not stay on the single thermal if it is not so big, we should search thermal as the butterfly searches the honey. Finally we can get the long thermal duration.
The conventional HLG can not move on the next thermal because it fly so slowly. This is the point when you fly aileron models such as Radina DLG. |
|
| Technical
Notes: |
(1) The history of DLG
The SAL stands for Side Armed Launch and means the throw the glider like slider. The DLG stands for discus Launch Glider and means the discus throwable glider. The history of DLG is introduced in the DVD video provided by the Radio Carbon Art, Inc. The story of DLG is summarized as follows; (I made summary from this DVD. If there is incorrect contents, please let me know.)
Mr. Phil Pearson made an idea of DLG, at first in the world. Harold, his friend has the handicap in his arm and could not throw the glider from over head. He throw his glider by rotating his arm parallel to the ground. It was a kinds of Side Armed Launch. The maximum throwing angle was 270 degrees, not the discus throw. So it was called as SAL at this time. It was natural that the glider could not get high altitude and was wandering only near the surface. The idea it self came from the fact that his wife threw acrobat class plane into the sand storm, that small plane raised and returned to her. And he saw it flew in the storm circling in the storm when she threw it again, then it flew higher than the last time. (It's like a Tornado
throw of Nomo, the base ball player.) After that, Phil talked with Harold about throw with rotating more than 360 degrees. That is it, the discus launch. The first model used for the discus launch was the acrobat class plane with aileron, 40inches model (about 1m span). In order to cancel out the yawing at launching, the cross tail model was adopted. The problem in the early days was that the wing tip end was seized by hand at launch and therefore the tip end was deformed. That means the wing profile was changed at the tip end of the wing. This issue was fixed by the idea from German team that is to use pin at the end of wing for hooking fingers. The structure of the wing spar became important. The spar was reinforced, because the pin was attached at the end of the spar. Tim johnson made a model with 60 inches span with polyhedral and he changed to dihedral, because the model with polyhedral had weakness at the junction portion on the wing. After some efforts, the model was becoming to be the current design and shape. |
|
|


