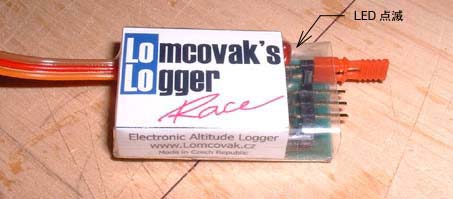
 This page was presened by Mr.Kanoh, who are famous as a excellent
DLG flier in Japan.
This page was presened by Mr.Kanoh, who are famous as a excellent
DLG flier in Japan.FLy LOLO(Mar.2003) Last Update on
This page was presened by Mr.Kanoh, who are famous as a excellent
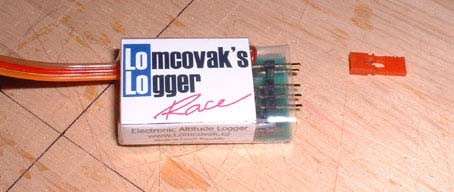
DLG flier in Japan.| What you receive in the Kit of LOLO. | |||||||||||||||||||||||||||||||
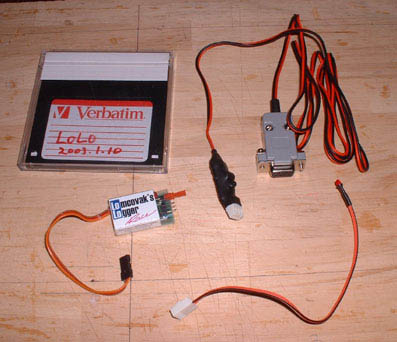 |
- LOLO altimeter Module - PC interface (RS-232 standard) - 3.5. Floppy Disk containing the macro for Windows 98 (XP, 2000, NT) & MS Excel to process data. Starting 15-th November 2002 Floppy Disk will be supplied only on request (extra costs) - External LED cable (This LED syncronize with LED on LOLO while working except initialization phase) |
||||||||||||||||||||||||||||||
| Technical Specification | |||||||||||||||||||||||||||||||
|
The session is defined as a series of action of LOLO from Power-ON till Power-OFF. The measured and stored record in a session is independent to the others, whose the time stamp of the first data is always zero. Each session can have different sampling rate. In case of LOLO RACE, LOLO measures the pressure at this time and set it as the reference pressure, that is, zero meter. Because the reference pressure can be varied at each session,this function enable LOLO prevent from gettting negative altitude. The utility, ANALOLO for DOS identify the negative altitude as landing. In order to avoid negative altitude, a new session should be allocated to each flight to get new refeence pressure and should download each time. Even if the last measuring point is the same as the first point, both two measured pressures at the that point, may be different, because the flight is long and the pressure changes during one flight. |
||||||||||||||||||||||||||||||
|
Maximum
recordable time and its sampling rate.
|
Sampling
rate is defined as the time period for measuring and recording ,which
is a key factor to convert analog data to digital data. Shorter sampling
rate make the record with more fidelity. Because the number of records
recordable by LOLO is limited to 8100 points, shorter sampling rate leads
shorter maximum recordable time as shown in the left table. Usual sampling rates . - 0.2/0.5 F3F, F3B, F3J and F3K (HLG) . - 0.2/1.0 F3F, F3B, F3J and F3K (HLG) and the others aircrafts with long log possibility 1.0=160min=more than 2.5 hours . -0.5/2.0 all aircrafts with very long log possibility 2.0=320min=nearly 5.5 hours If sampling rate is 0.2, the altitlude can be measured for 27 min. It seems to be enough for HLG, because of its battery lifetime. If you want to analize your flight in detail, the sampling rate 0.1 might be necessary. The working time of Task A of F3B is 14 minutes. 0.1 might be too short in this case. |
||||||||||||||||||||||||||||||
|
It's also possible to make custom (extra costs) made LOLO with any combination of two from: 0,1; 0,2; 0,3; 0,5; 1; 2; 1.5; 3; 5; 8 sec. |
||||||||||||||||||||||||||||||
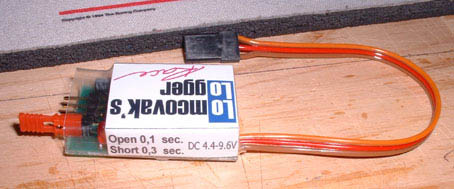 |
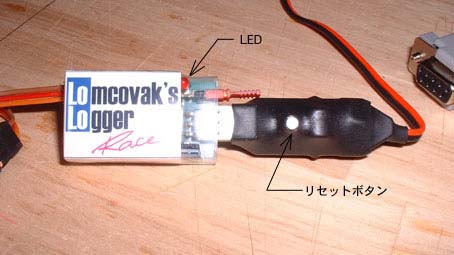
Prior
to power-on you should set the sampling rate via the jumper located on
the LOLO (see picture). No jumper installed will be the shorter of two
sampling rates. With the jumper installed the sampling rate will be longer
of the two rates. The sampling rate is initialized only upon power-up
therefore you must disconnect power if you wish to change the sampling
rate. The product shown in left picture is 0.1/0.3sec, which is indicated on the side of LOLO altimeter With the jumper installed is 0.3sec. |
||||||||||||||||||||||||||||||
 |
No jumper installed is 0.1 sec | ||||||||||||||||||||||||||||||
| How to use LOLO | |||||||||||||||||||||||||||||||
| 1. Erase data | 2. Measurement test | ||||||||||||||||||||||||||||||
 |
 |
||||||||||||||||||||||||||||||
|
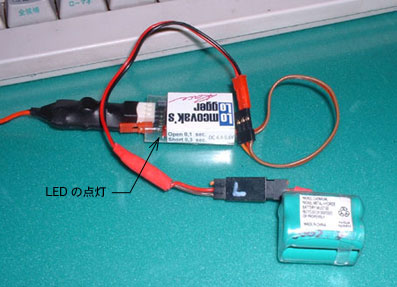
For erasing data on the device, after conecting LOLO with PC Interface cable, you must push and hold the RST bottan and turn on the 4.8 volts power supply. Then LED will begin flushing. The flushing means that erasing is completed. Then PC interface cable maybe disconnected. |
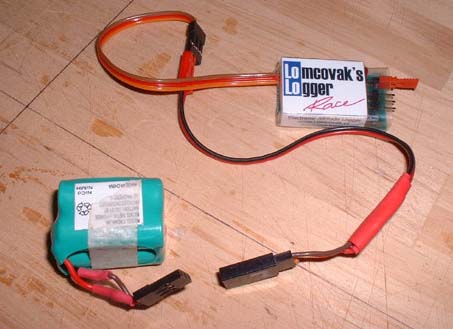
Before installing LOLO into fuselage of the model, it it recommended for you to test LOLO functions. Because LOLO and battery have male connector, adapter cable must be prepared. |
||||||||||||||||||||||||||||||
| 3.Measurement | |||||||||||||||||||||||||||||||
|
|
Upon power-up LED
on your altimeter will flash shortly signaling that the Power-On-Self-Test
(POST). After POST, the LED will flash continuously in interval 1sec
ON/ 1sec OFF. This is initialising phase which allows LOLO to adapt
outside environment (temperature, pressure, etc.). Duration of this
phase is fixed to 120sec. |
||||||||||||||||||||||||||||||
| Fly
your model and measure termination |
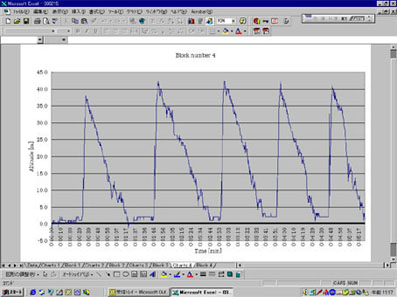
When LOLO has just started logging, then you will fly and measure altitude until LOLO is POWER-OFF. This duration is called a session. During one session, there may be one or more flights. A graph will be made for each session. |
||||||||||||||||||||||||||||||
| 4. Software Installation | |||||||||||||||||||||||||||||||
| The installer of Excel-Macro, "InstLolo.exe" is in the attached floppy disk or can be downloaded from Lomcovak Homepage of LOLO . Execute InstLolo.exe by doubly clicking it. Then a icon such as the left icon will be created on the desktop of your PC | |||||||||||||||||||||||||||||||
| 5.Download and graph altitude data of your flight | |||||||||||||||||||||||||||||||
| |
 |
||||||||||||||||||||||||||||||
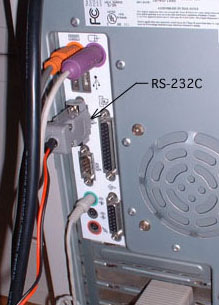
|
First
of all, you must let LOLO POWER-OFF, then connect RS232C interface cable
with LOLO altimeter module. LOLO may remain in the fuselage.
|
you will follow up with connecting RS232C interface cable with your PC (RS232C-port). If your note PC does not have RS232C port, please read Section "USB-Serial Converter". |
||||||||||||||||||||||||||||||
 |
 |
||||||||||||||||||||||||||||||
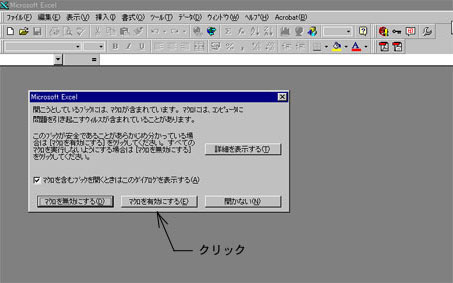
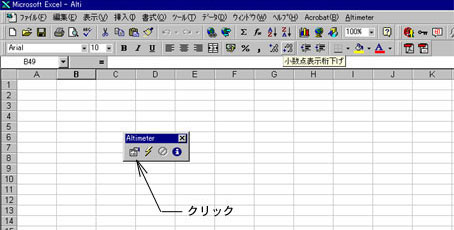
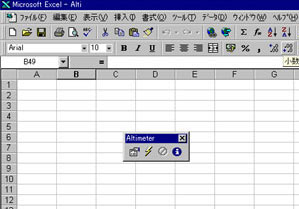
| Click Altimeter icon on the desktop that is explained in the "Software Installation" section, above. Then Excel will ask you if you permit to make Excel macro executable or not in the above screen shot. Please canswer "Yes". | If you click the first left bottun in Altimeter launcher window, then Configuration window will displayed shown in the next. | ||||||||||||||||||||||||||||||
 |
 |
||||||||||||||||||||||||||||||
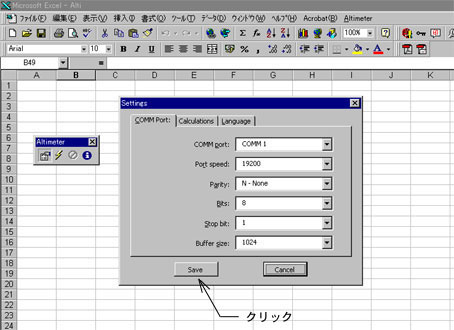
|
Setting window enable
you change communication configuration. You need not change any parameter
in this window in usual. After you confirm COM port once, then you need
not open it hereafter. |
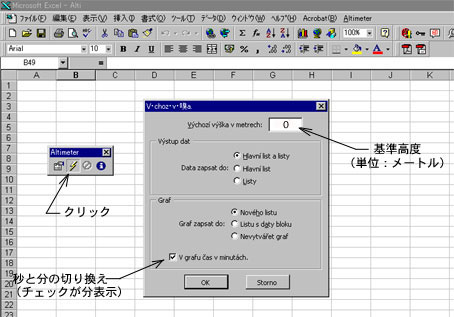
If you click Lightning
icon, then automatic sequence for download and graph data will be started.
The first window in this series, enable you; |
||||||||||||||||||||||||||||||
 |
 |
||||||||||||||||||||||||||||||
| After vanishing previous window, Altimeter launcher window is shown as above, and "Reading data from COM1....." is indicated left bottom of the Execl window. | Let LOLO POWER-ON. Recorded data will be automatically transfered to the Excel spreadsheet. The LED on your LOLO will remain lit while data is being transfered. Data transfer time will vary depending of stored data. When LED goes OFF, transfer is completed and you can switch off device. | ||||||||||||||||||||||||||||||
 |
|||||||||||||||||||||||||||||||
| Then Graph will be automatically drawed as shown above. All charts or data can be simply modified using standard Excel features. | |||||||||||||||||||||||||||||||
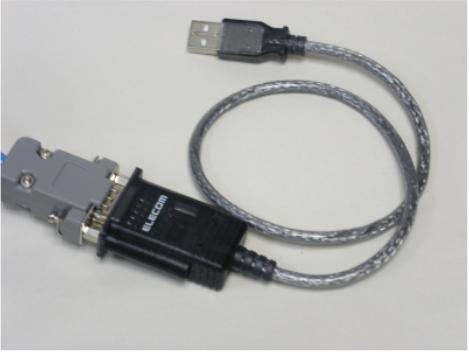
| The
Note PC does not have any RS232C Serial port, recently but has only USB
interface. Therefore USB-Serial converter is available for those PC as
shown in the right figure, less than 30US$. This converter enable LOLO
data being download via USB port of PC. Please pay attention some product
does not work for the LOLO. Please use such product as it is confirmed
to work for LOLO. The following products was confirmed that LOLO works
in actual, in Japan. - ELECOM UC-SGT USB-Serial Converter - I/O data USB-Serial Converter (I do not the exact name in your country. Sorry) |
 |
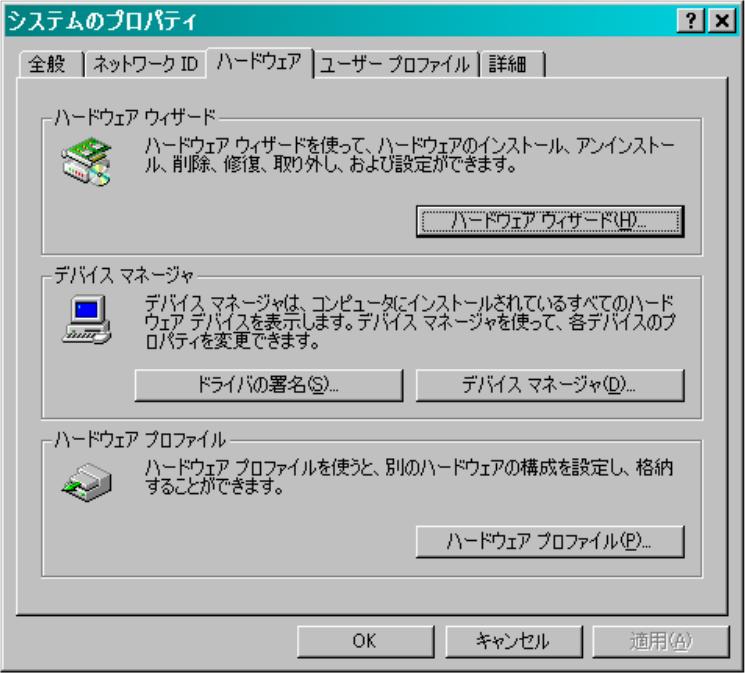
| The
default Serial port as factory standard is COM1. ELECOM USB-Serial Converter
uses COM5 not COM1. In order to know which port your product uses, you
must investigate in the following manner. 1.Connect the cable of Converter to the USB port of your PC. (Without connection, you can not see COMport number, even you execute all of the follow-on steps.) 2. Select Control Panel 3. Click "System" icon, then the window as shown in right figure. 4. Click "Harware wizard" button" |
 |
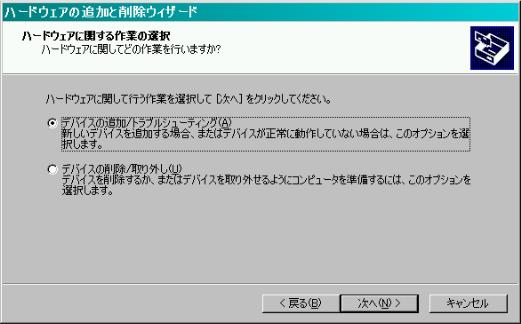
| 1.
Select Add device/Trouble shooting 2. Click "Next" |
 |
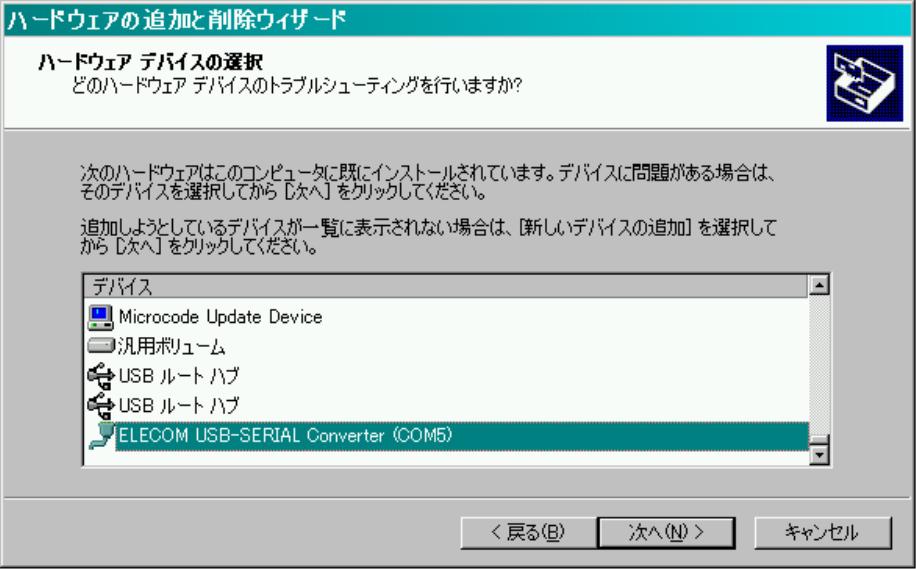
| Then
all new hardware are searched and All avialable port will be listed as
right window. Find out the port your converter uses from the list. For example, "ELECOM USB-SERAIL Converter (COM5) " |
 |
| Click the most left bottun in Altimeter launcher window. Set COMM Port to COMM5 in the setting window, which is found in the above. If your converter uses COM4 then you must select "COMM4" here. | 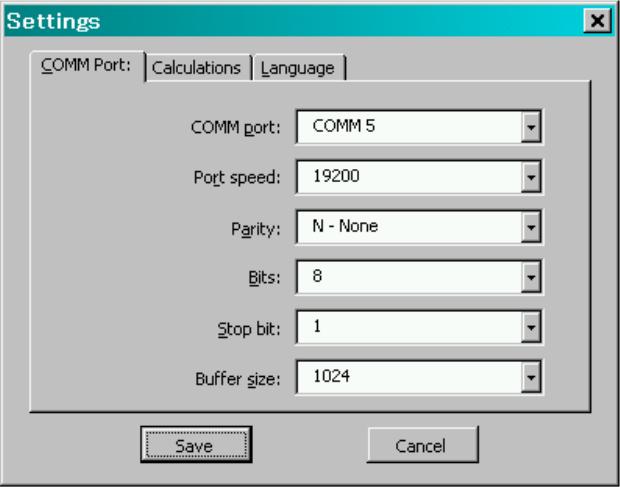 |